Introduction to Physically Based Rendering and Shaders
Achieving realism in computer graphics requires a phenomenal amount of computing power. In order to reduce that workload, 3D graphics uses techniques like Physically Based Rendering (PBR), which simulates the realistic way that light interacts with surfaces. PBR relies on image-based data which can enhance a surface with additional detail using precalculated image-based representations of different properties. For example, the metallic map defines which areas of a texture are more reactive to light reflection.
Implementing PBR in real-time environments like web browsers presents additional challenges. Web technologies, such as WebGL, have more constraints compared to desktop software APIs like OpenGL. Compared to Three.js, Blender has more flexibility and more advanced rendering options that can be applied without concern for performance overhead. Shaders, the small programs that run on the GPU, can play a critical role in bridging this gap, allowing developers to create custom effects, lighting models, and procedural textures that can approximate a great level of detail without sacrificing performance.
In this article, I’ll walk through the process of creating physically based materials for a web game using Three.js and custom shaders, showcasing both the obstacles and breakthroughs involved in adapting complex materials originally designed in Blender to run efficiently in a browser environment.
Designing physically based materials for the web
As part of my recent sprint on the Open Studios project Langenium, I worked on a ticket called “Basic Scenery”. While models have come and gone over the history of this project, the game has retained only one model for the player’s avatar and one for background scenery, both developed for the original Langenium project back in 2012 so they were noticeably lacking in detail.
Originally I thought I’d add some common materials to the game using free materials from online resources like FreePBR, however for ease of use I opted to use free materials provided by the BlenderKit add-on. Unfortunately the models exported for use in the game engine had no textures despite the materials being ticked for export. After some Googling I learned that I had to “bake” the shader materials in order for them to be exported and loaded in other environments like Three.js.
The Union Platform Model enhanced with a couple of free materials from the BlenderKit materials library.
Baking the materials fixed the issue and allowed shader material textures to export from Blender, but the file sizes had grown from 170KB to 30MB, which isn’t acceptable for a web based game. Even if I could get away with one model, the cumulative effect of several models that size would mean people on mobile can’t play. Worse yet – the textures, even with good compression, were blurry and no longer dynamically reacting to directional light, or showing animations. That file size is pretty standard in video games but it just wasn’t acceptable given how much better everything looked in Blender where the materials were at a higher resolution and, most importantly, were animated and reacting to directional light.
Having a bit of practise implementing my own shader based materials in Blender and Three.js, I realised it was probably possible to recreate the BlenderKit materials within a THREE.ShaderMaterial. My first attempt implemented NodeToy. I got something resembling the material pretty quickly however when I went to use it I got a lot of errors in my game. NodeToy uses it’s own format for shaders so I couldn’t easily adapt what I’d created without the NodeToy add-on.
It was time to try a programmatic approach instead of relying on a 3rd party’s custom format.
Writing a custom shader material for a sci-fi aircraft
Blender is open source but written in Python and the shader code is written within a larger shader material framework designed specifically for use in Blender’s application framework. Programmatically speaking, it means I couldn’t just lift the shader code I needed and stitch them back into my code – there were lots of smaller variables and settings that had to be setup in order to use their code for things like the Voronoi function. Licensing meant I may not have the rights to just take that bit of code from Blender for my project. There also wasn’t a clear connection between some of the settings in the code and what was being used in the Blender application so I just had to write my own from scratch and build it up.
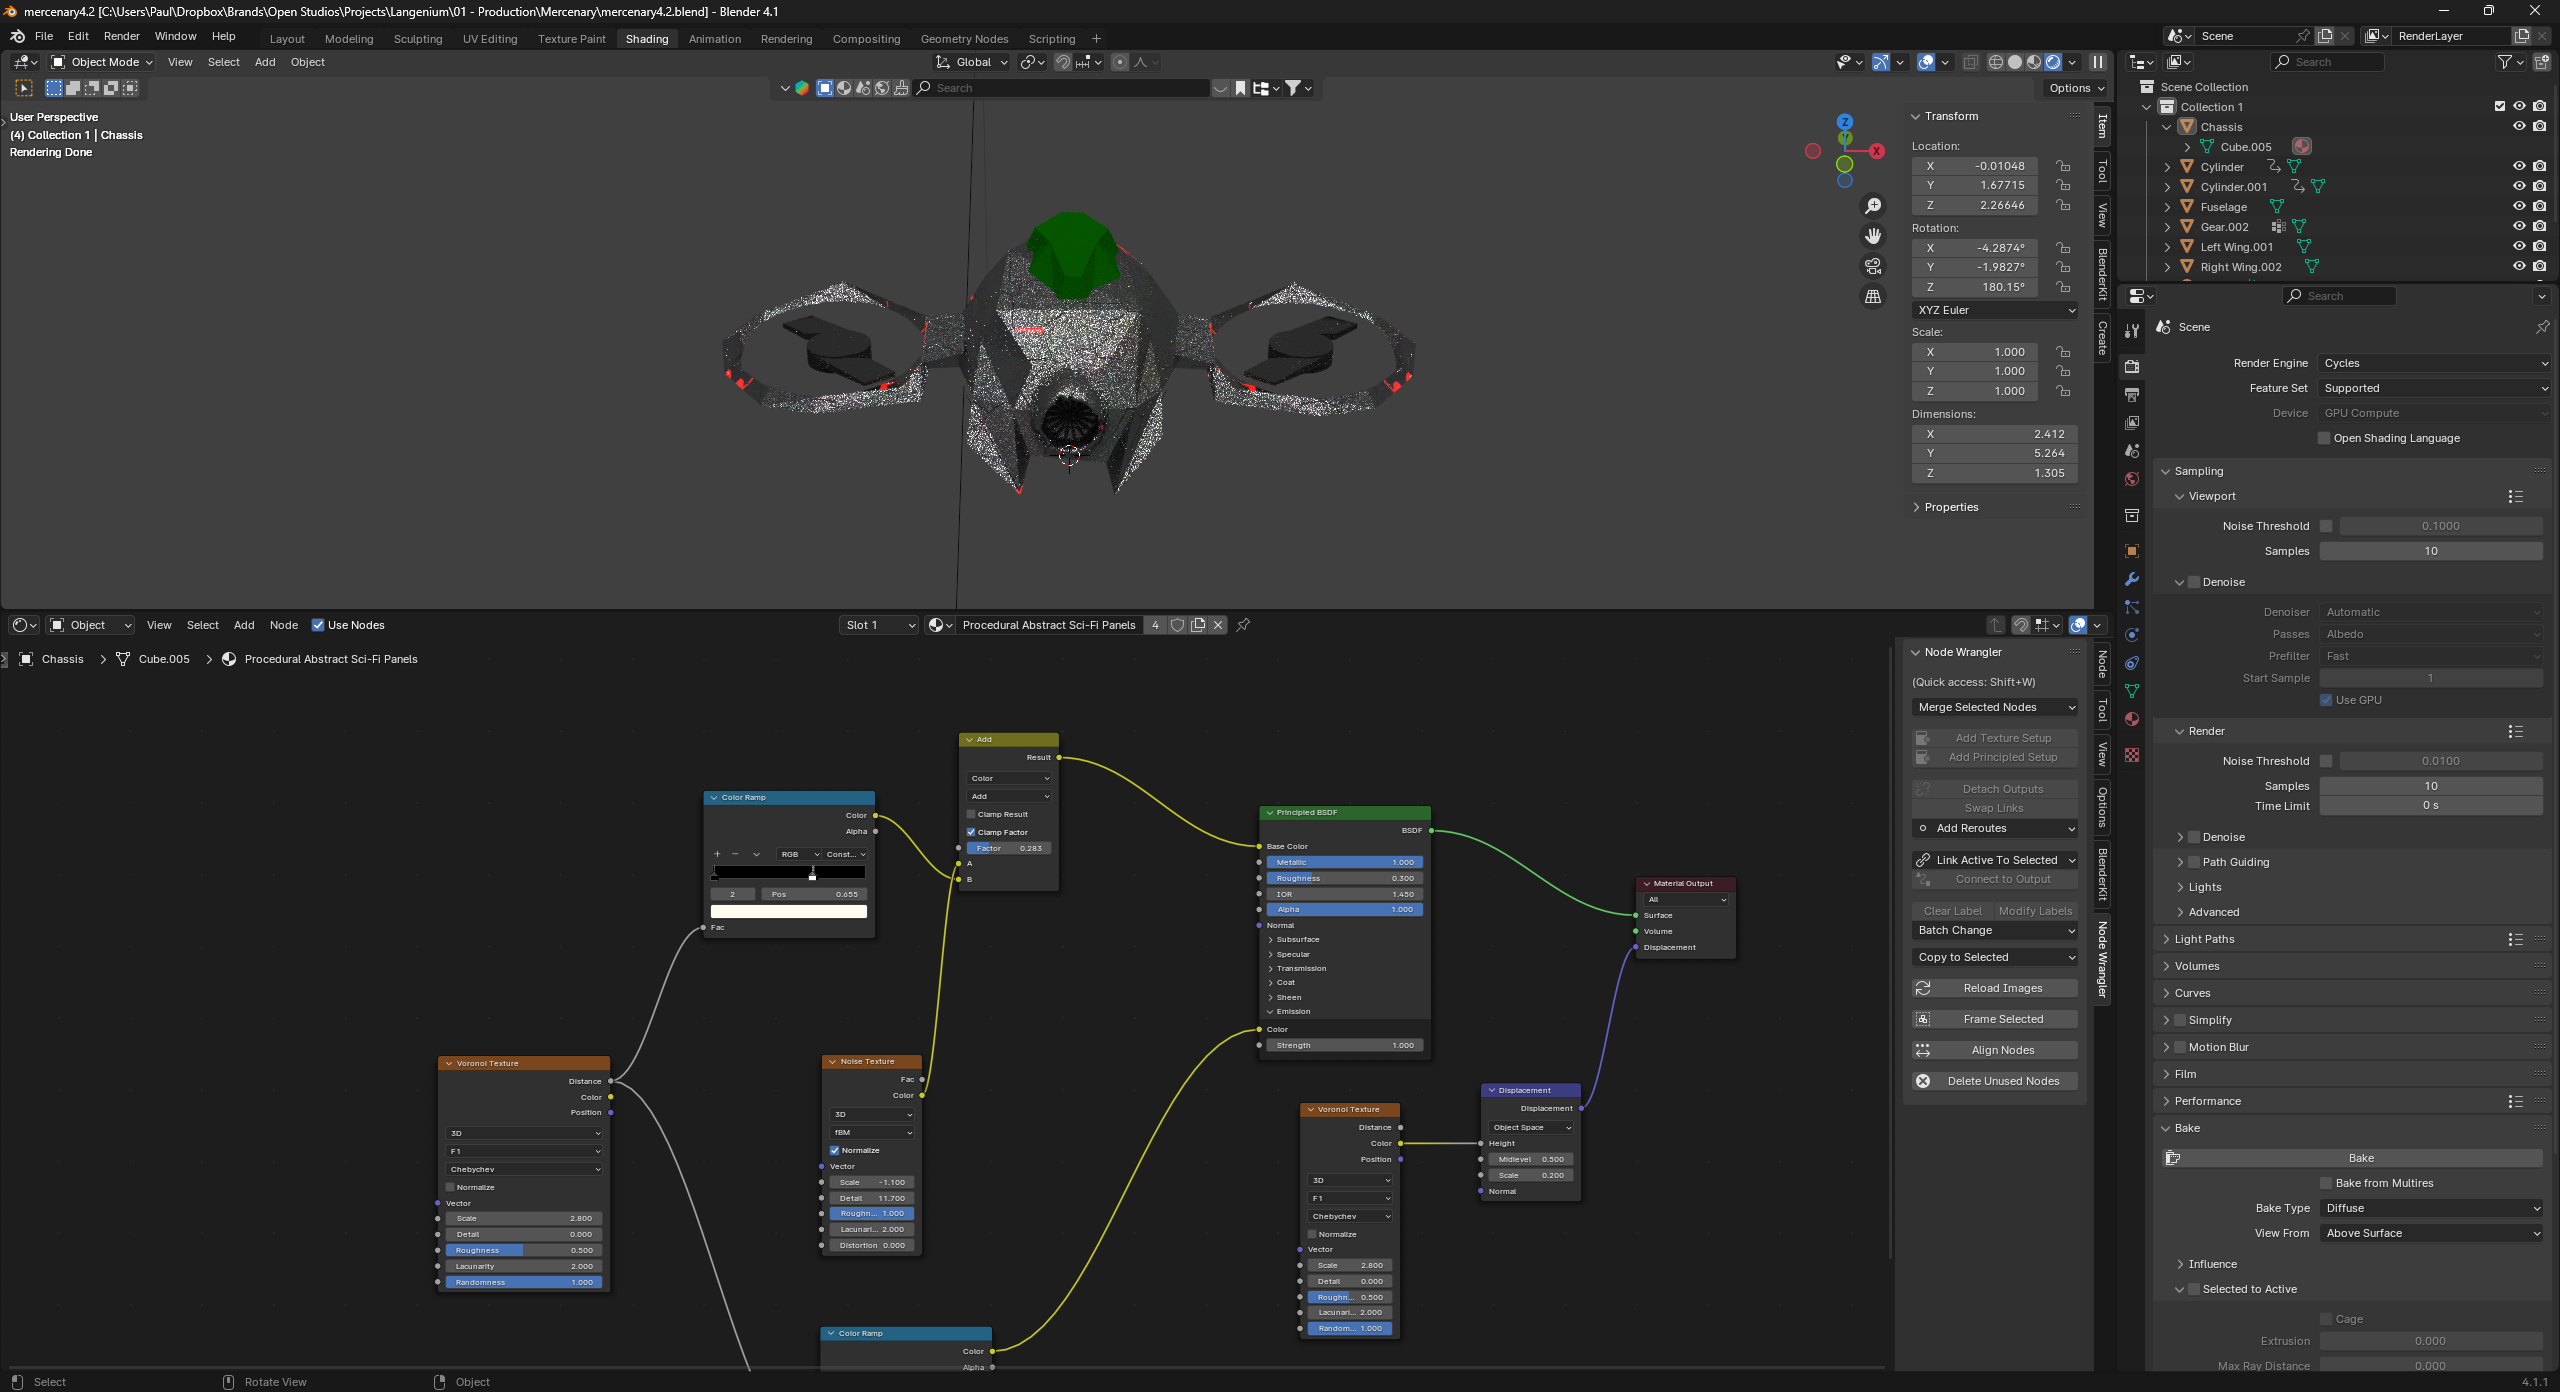
To implement my own custom shader, I created a new ShaderMaterial (js code below) and added some script tags to my document that would contain the shader code. I cloned one of the existing game shaders as a boilerplate, gutted it down to a simple colour draw (html/glsl code below) and got to work populating it with logic that corresponded to each node, and link, in the Blender shader material.
js
let material =newTHREE.ShaderMaterial({vertexShader: document.getElementById('proceduralBuildingVertShader').textContent,fragmentShader: document.getElementById('proceduralBuildingFragShader').textContent,uniforms: settings.uniforms
});
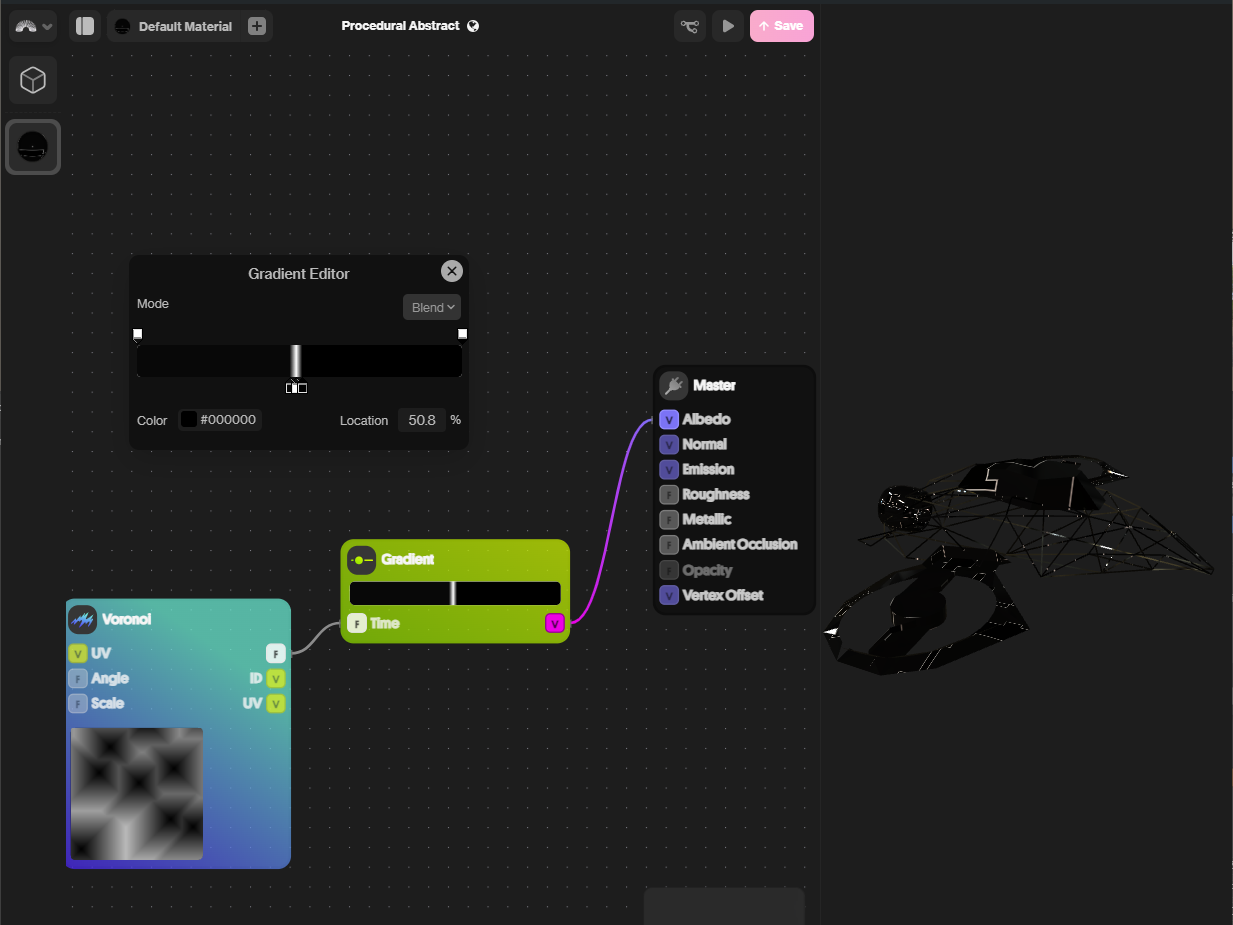
Recreating the Colour Ramp node was a matter of finding a GLSL gradient function I could adapt. Turning to Github I was fortunate to find an open source Gist containing a variety of gradient functions I could use. After the gradient functions were in place to mimic the Color Ramp node, the material began to match what I was seeing in Blender.
Searching Github can be very handy when you need to know how specific API’s or functions are implemented by other coders. Especially when you’re working on something a bit niche and can’t documentation in other places like forums, tutorial videos and dev blogs.
Replacing the Voronoi texture node
Voronoi textures are a popular tool for computer graphics, their cellular shapes can be made to resemble a number of artificial and natural structures. Within the material shaders I’m using, the cells from Voronoi textures are used to define structure and metal panels covering the surface of the aircraft.
I’ve never been good at maths and certainly it’s a bit beyond my ability to just write my own Voronoi functions from scratch. Learning how to do all this is certainly possible, but there had to be some kind of useful resource out there that could give me a leg up rather than losing months of my life to that.
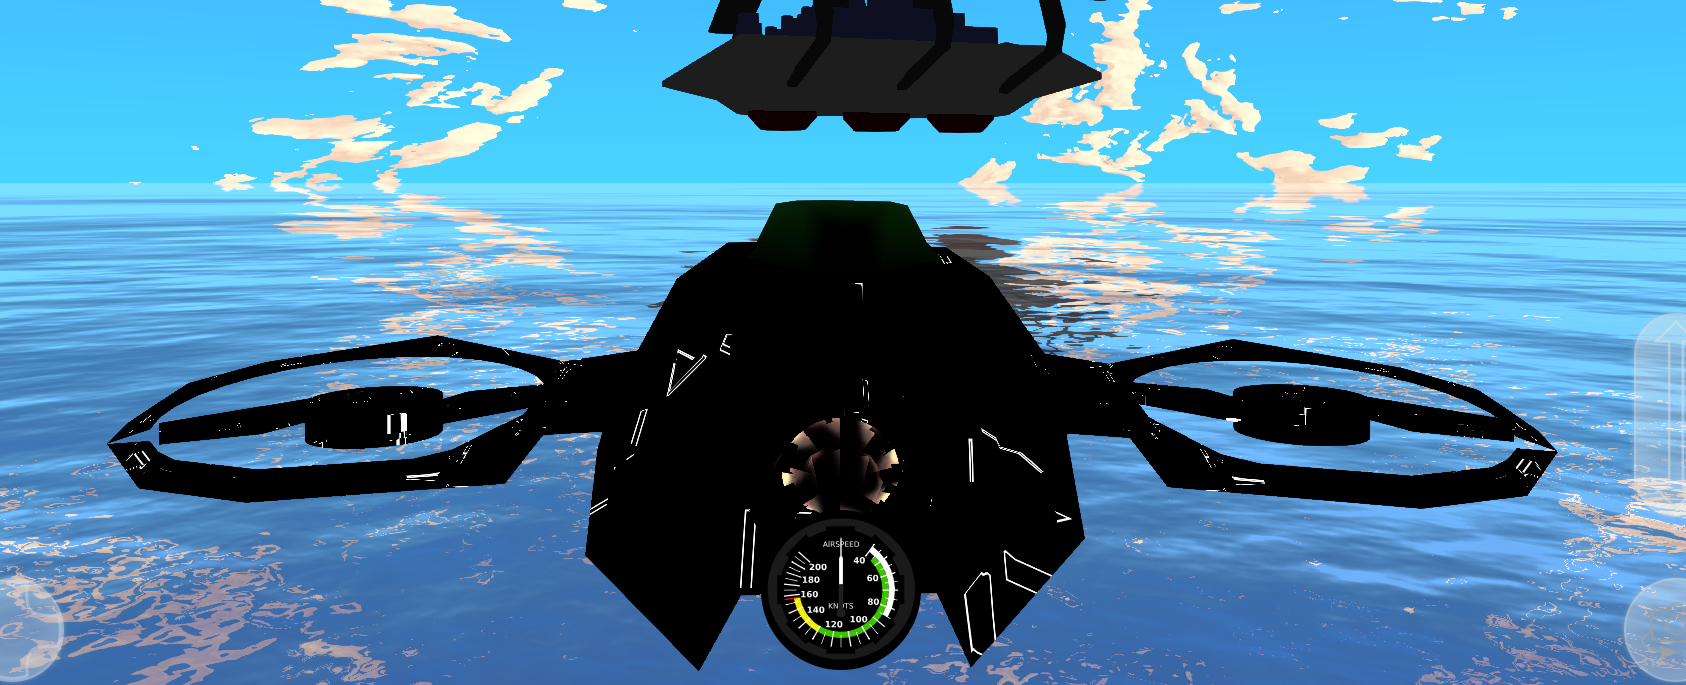
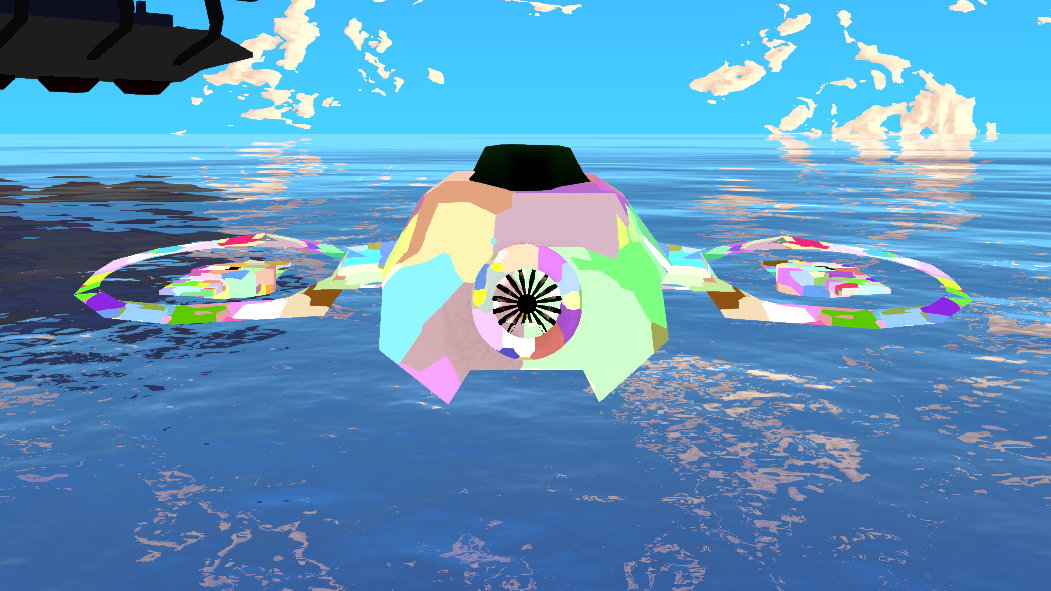
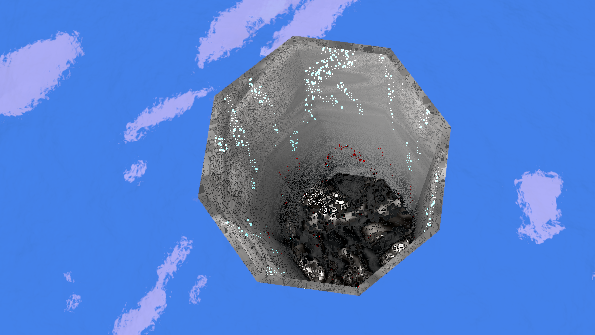
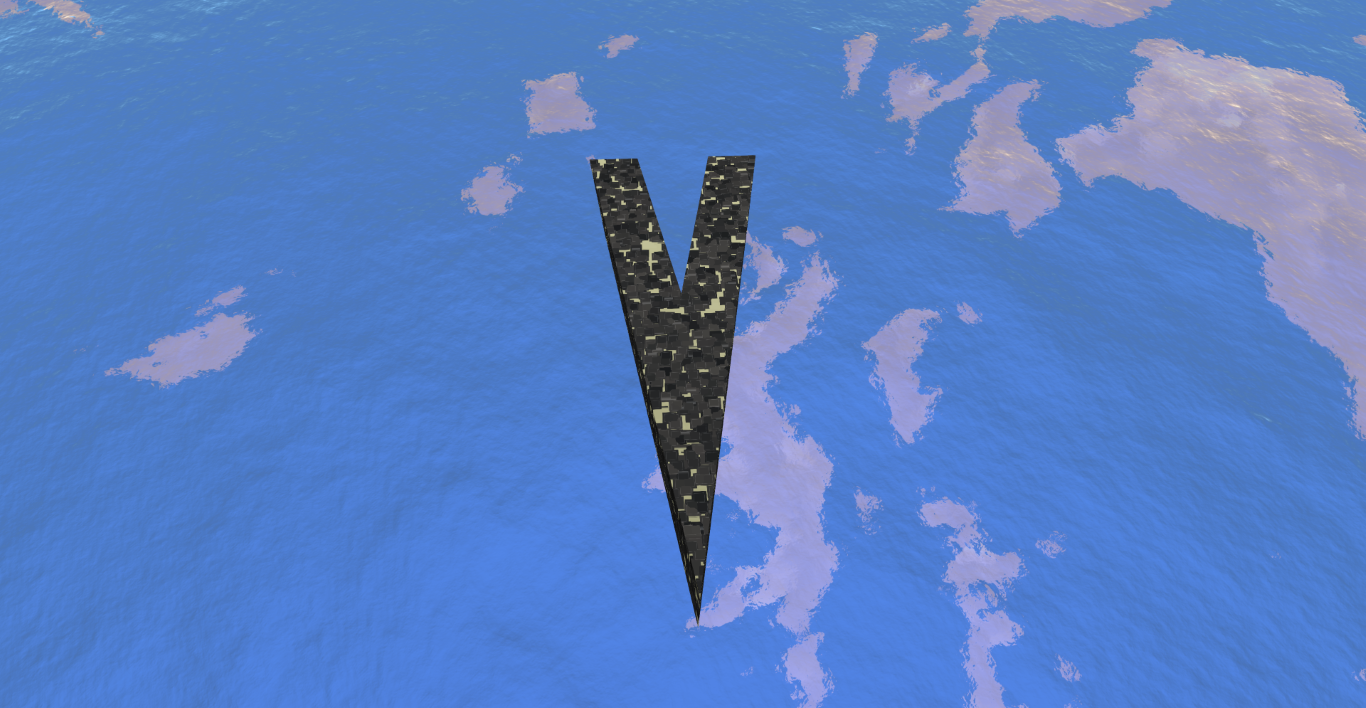
Mercifully someone had migrated the Voronoi function to native GLSL which gave me a good starting point. Once I got my own Voronoi function setup, it wasn’t too hard to complete the remainder of the shader materials to achieve an initial result on the player’s aircraft. Only one layer of the material is present in the screenshot below, the white lines, but with just that you can already see details emerge.
The shape of the Voronoi cells in my output didn’t quite match the original material – the BlenderKit material had metal panels made up of smaller shapes, while the most complex shapes I was initially creating were mostly whitespace with a few squares and triangles.
The first test of the new custom shader which combined the Voronoi texture with a black/white gradient.
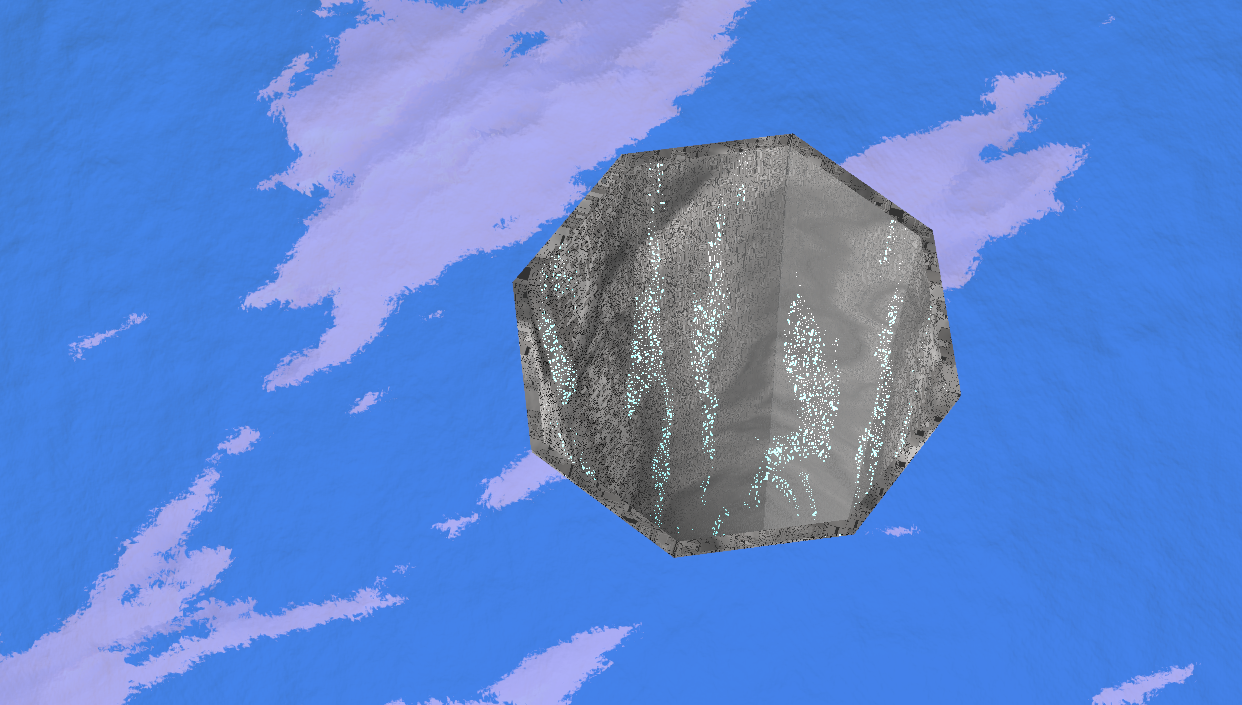
Debugging what’s going on within shaders in Blender is a matter of reconnecting nodes to inspect their respective outputs. Doing so with code is pretty similar, I changed the gl_FragColor to be the voronoi.rgb value until I got the mapping correct so that the shapes matched. The exact forms are a little bit different; I’m getting slightly more angular shapes instead of the cleaner cut straight angles of Blender’s Voronoi Texture node but it was good enough for my purposes here.
I tried for a while to match the Voronoi Texture output variables in GLSL code to the same outputs in Blender’s Voronoi Texture. This was important for recreating the same metal panelling shapes seen in the BlenderKit material. Blender was automatically normalising the RGB output to a grey colour, which I was able to recreate with a simple one liner provided by ChatGPT.
Writing custom shaders can be a challenging process, especially when things don’t work as expected. Shaders run within the GPU hardware making them notoriously difficult to debug since there’s no straightforward way to log variables or print errors like you would in traditional programming languages. Instead, you rely heavily on visual feedback and careful analysis of your code. Here are some things to keep in mind when debugging your own custom shaders.
Visualizing Outputs
One of the simplest yet most effective ways to debug shaders is visualizing calculated outputs directly in your scene. For instance, if you’re trying to understand what’s happening with a particular texture, uniform, or math operation, you can assign the value you’re working on directly to gl_FragColor in the fragment shader.
Many shader effects rely on the mathematical operations between variables that are themselves calculated elsewhere, so visualising what these individual components are doing can help move things along better than just trying endless variations of your original code.
Simplifying the Shader
When complex shaders crash your application or fail to compile, it helps to break the problem down by simplifying your shader code. Start by reducing it to a basic state (e.g., simple colour rendering) and then gradually reintroduce features like textures, lighting, and animation effects. This incremental approach lets you isolate the issue and ensures that you always have a working base to return to.
For example, when having issues with using my Voronoi texture as a mask, I gutted the original shader and started with a simple colour draw before adding each feature one at a time. This method made it easier to identify where things were going wrong as I reintroduced individual components.
This kind of step-by-step approach also keeps the shader manageable, allowing you to optimize as you go. Comprehending how a shader works can be confusing due to their per pixel nature, i.e. the entire Fragment shader runs for each pixel for each frame.
Setup for visual inspection
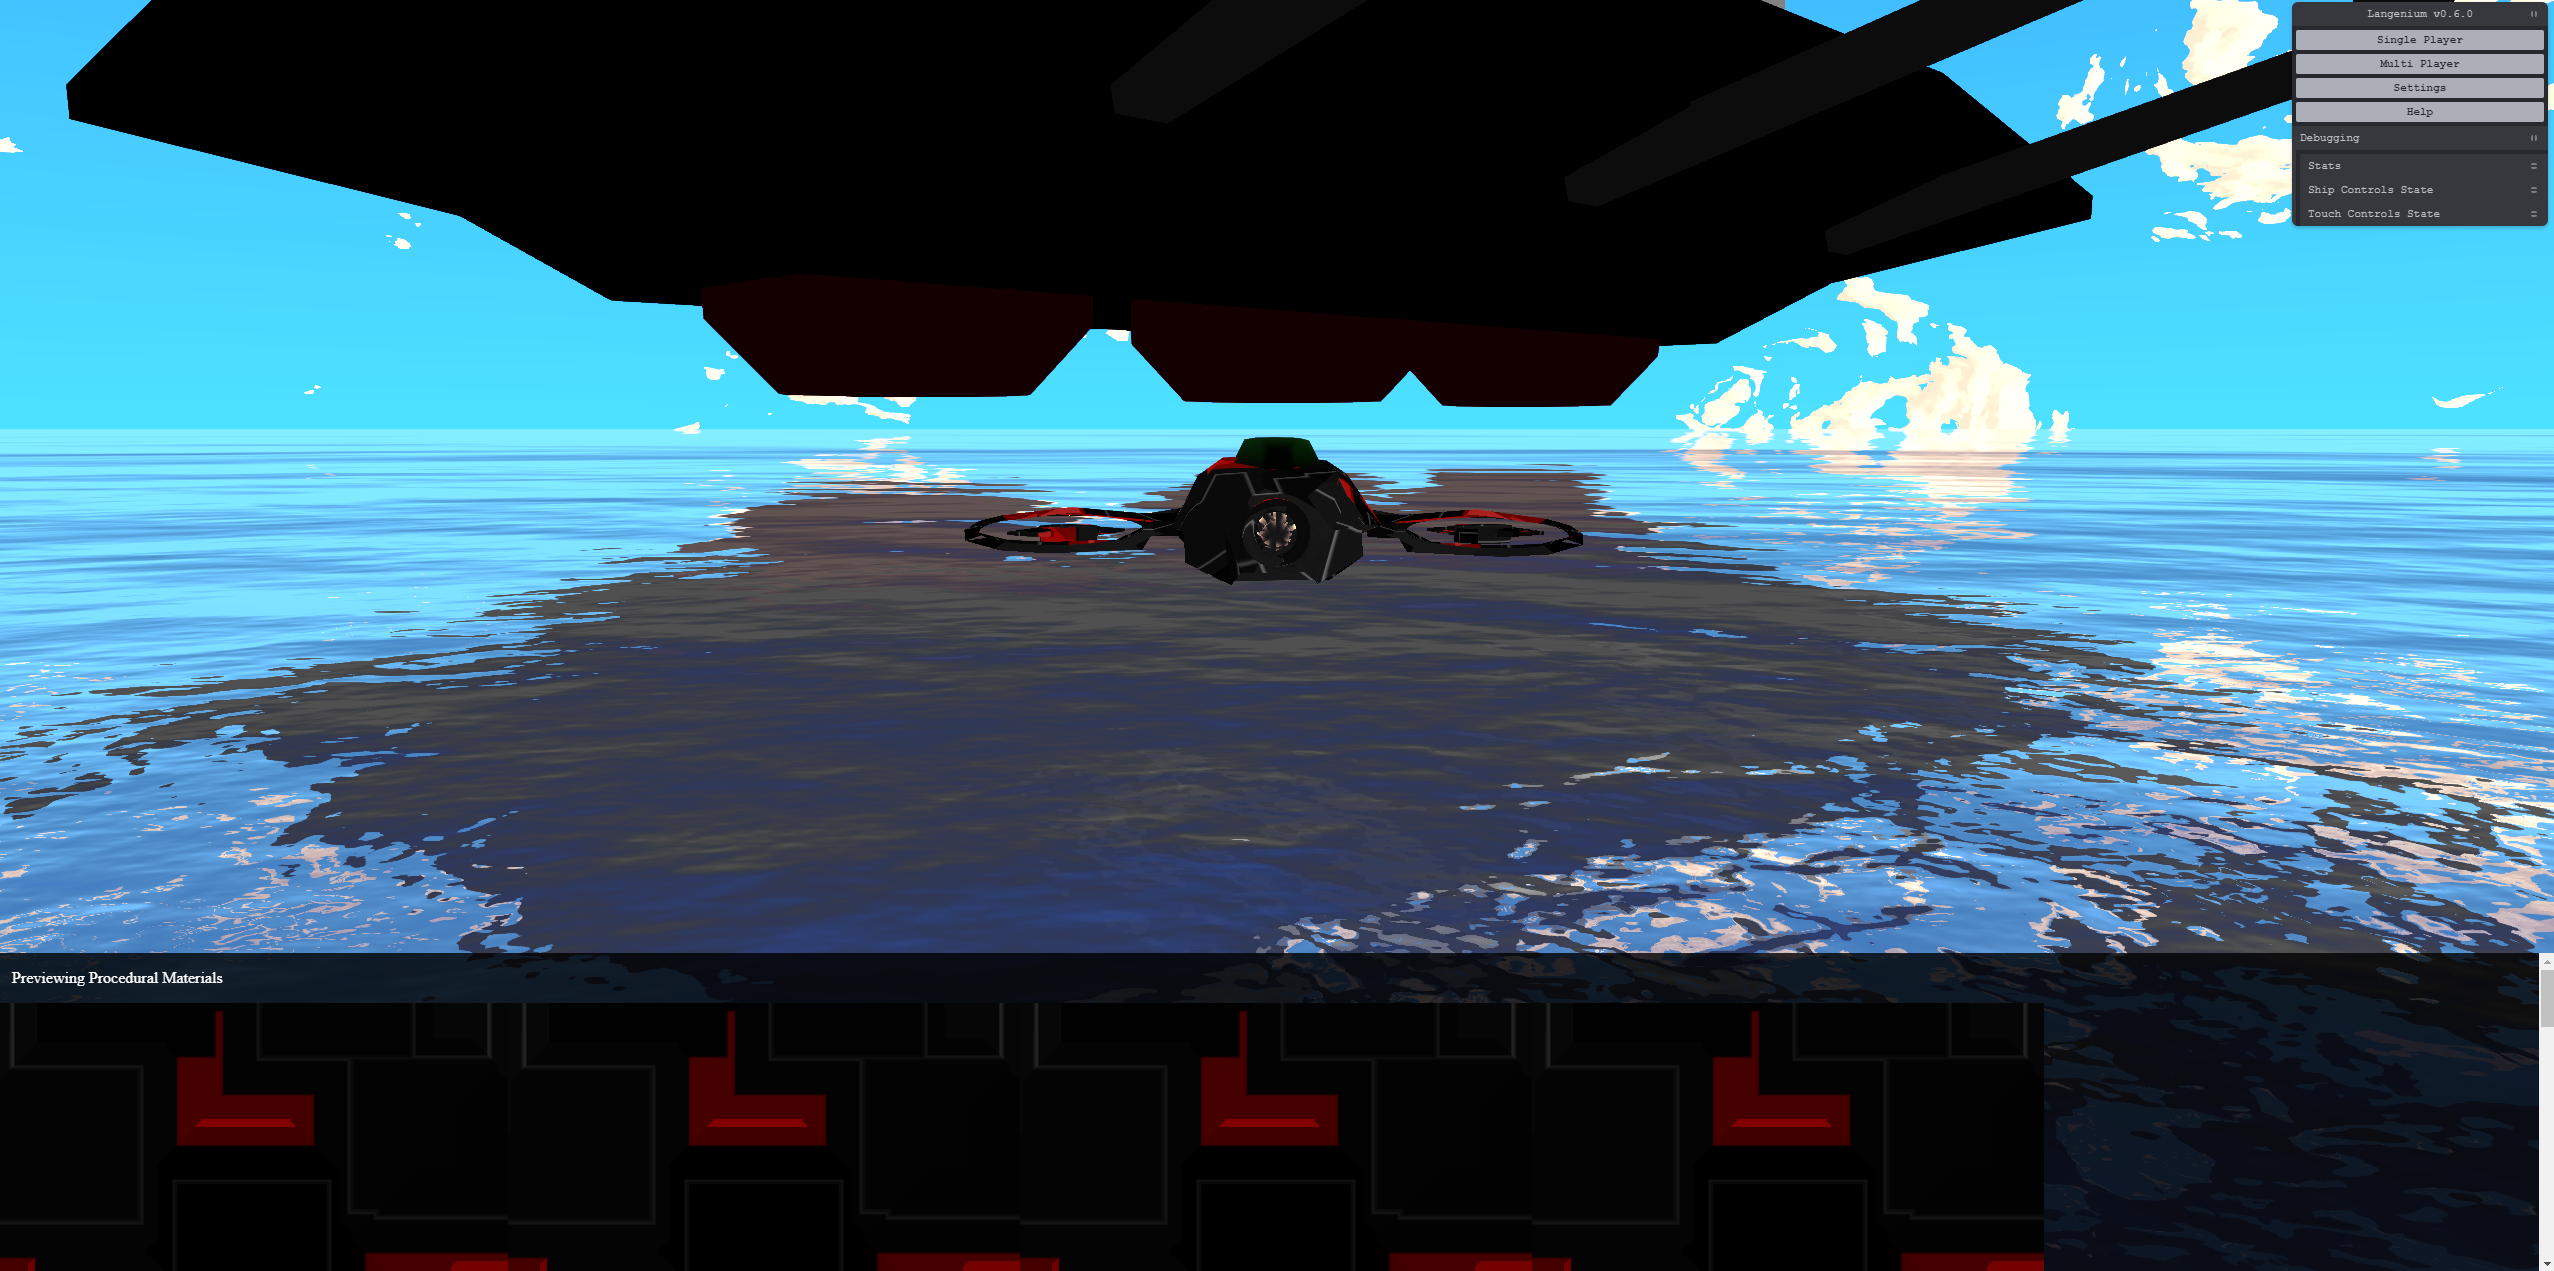
As part of this ticket, I extended the game engine with a debugging mode. When activated a scene outline appears along with performance stats and editor tools like orbit controls.
I used the debugging mode to switch the game from player controls to the orbit controls and targeted the object in question which allowed me to easily inspect it from multiple angles and distances.
For testing out geometry / vertex displacement, it was handy to switch into wireframe mode to see the exact effect that changes were having on objects.
WebGL Limits
Finally, remember that 3D on the web has certain limitations compared to desktop-based graphics applications like Blender. You may encounter limitations with precision, texture formats, and how geometry is handled. For example, WebGL shaders might not support some complex procedural textures or displacement effects that work in Blender. Instead, you can use alternatives such as pre-calculated textures or vertex shaders to handle some of the geometry calculations.
Comparing Blender shader material to final code
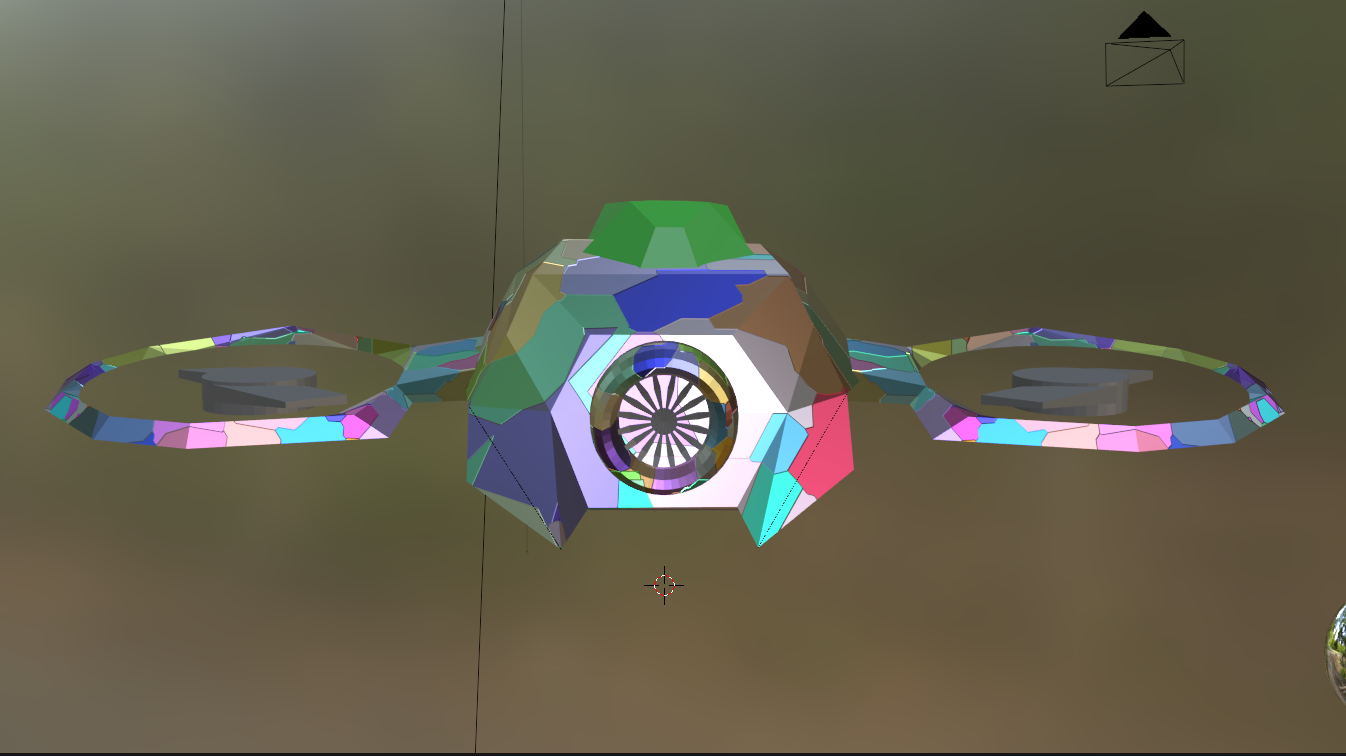
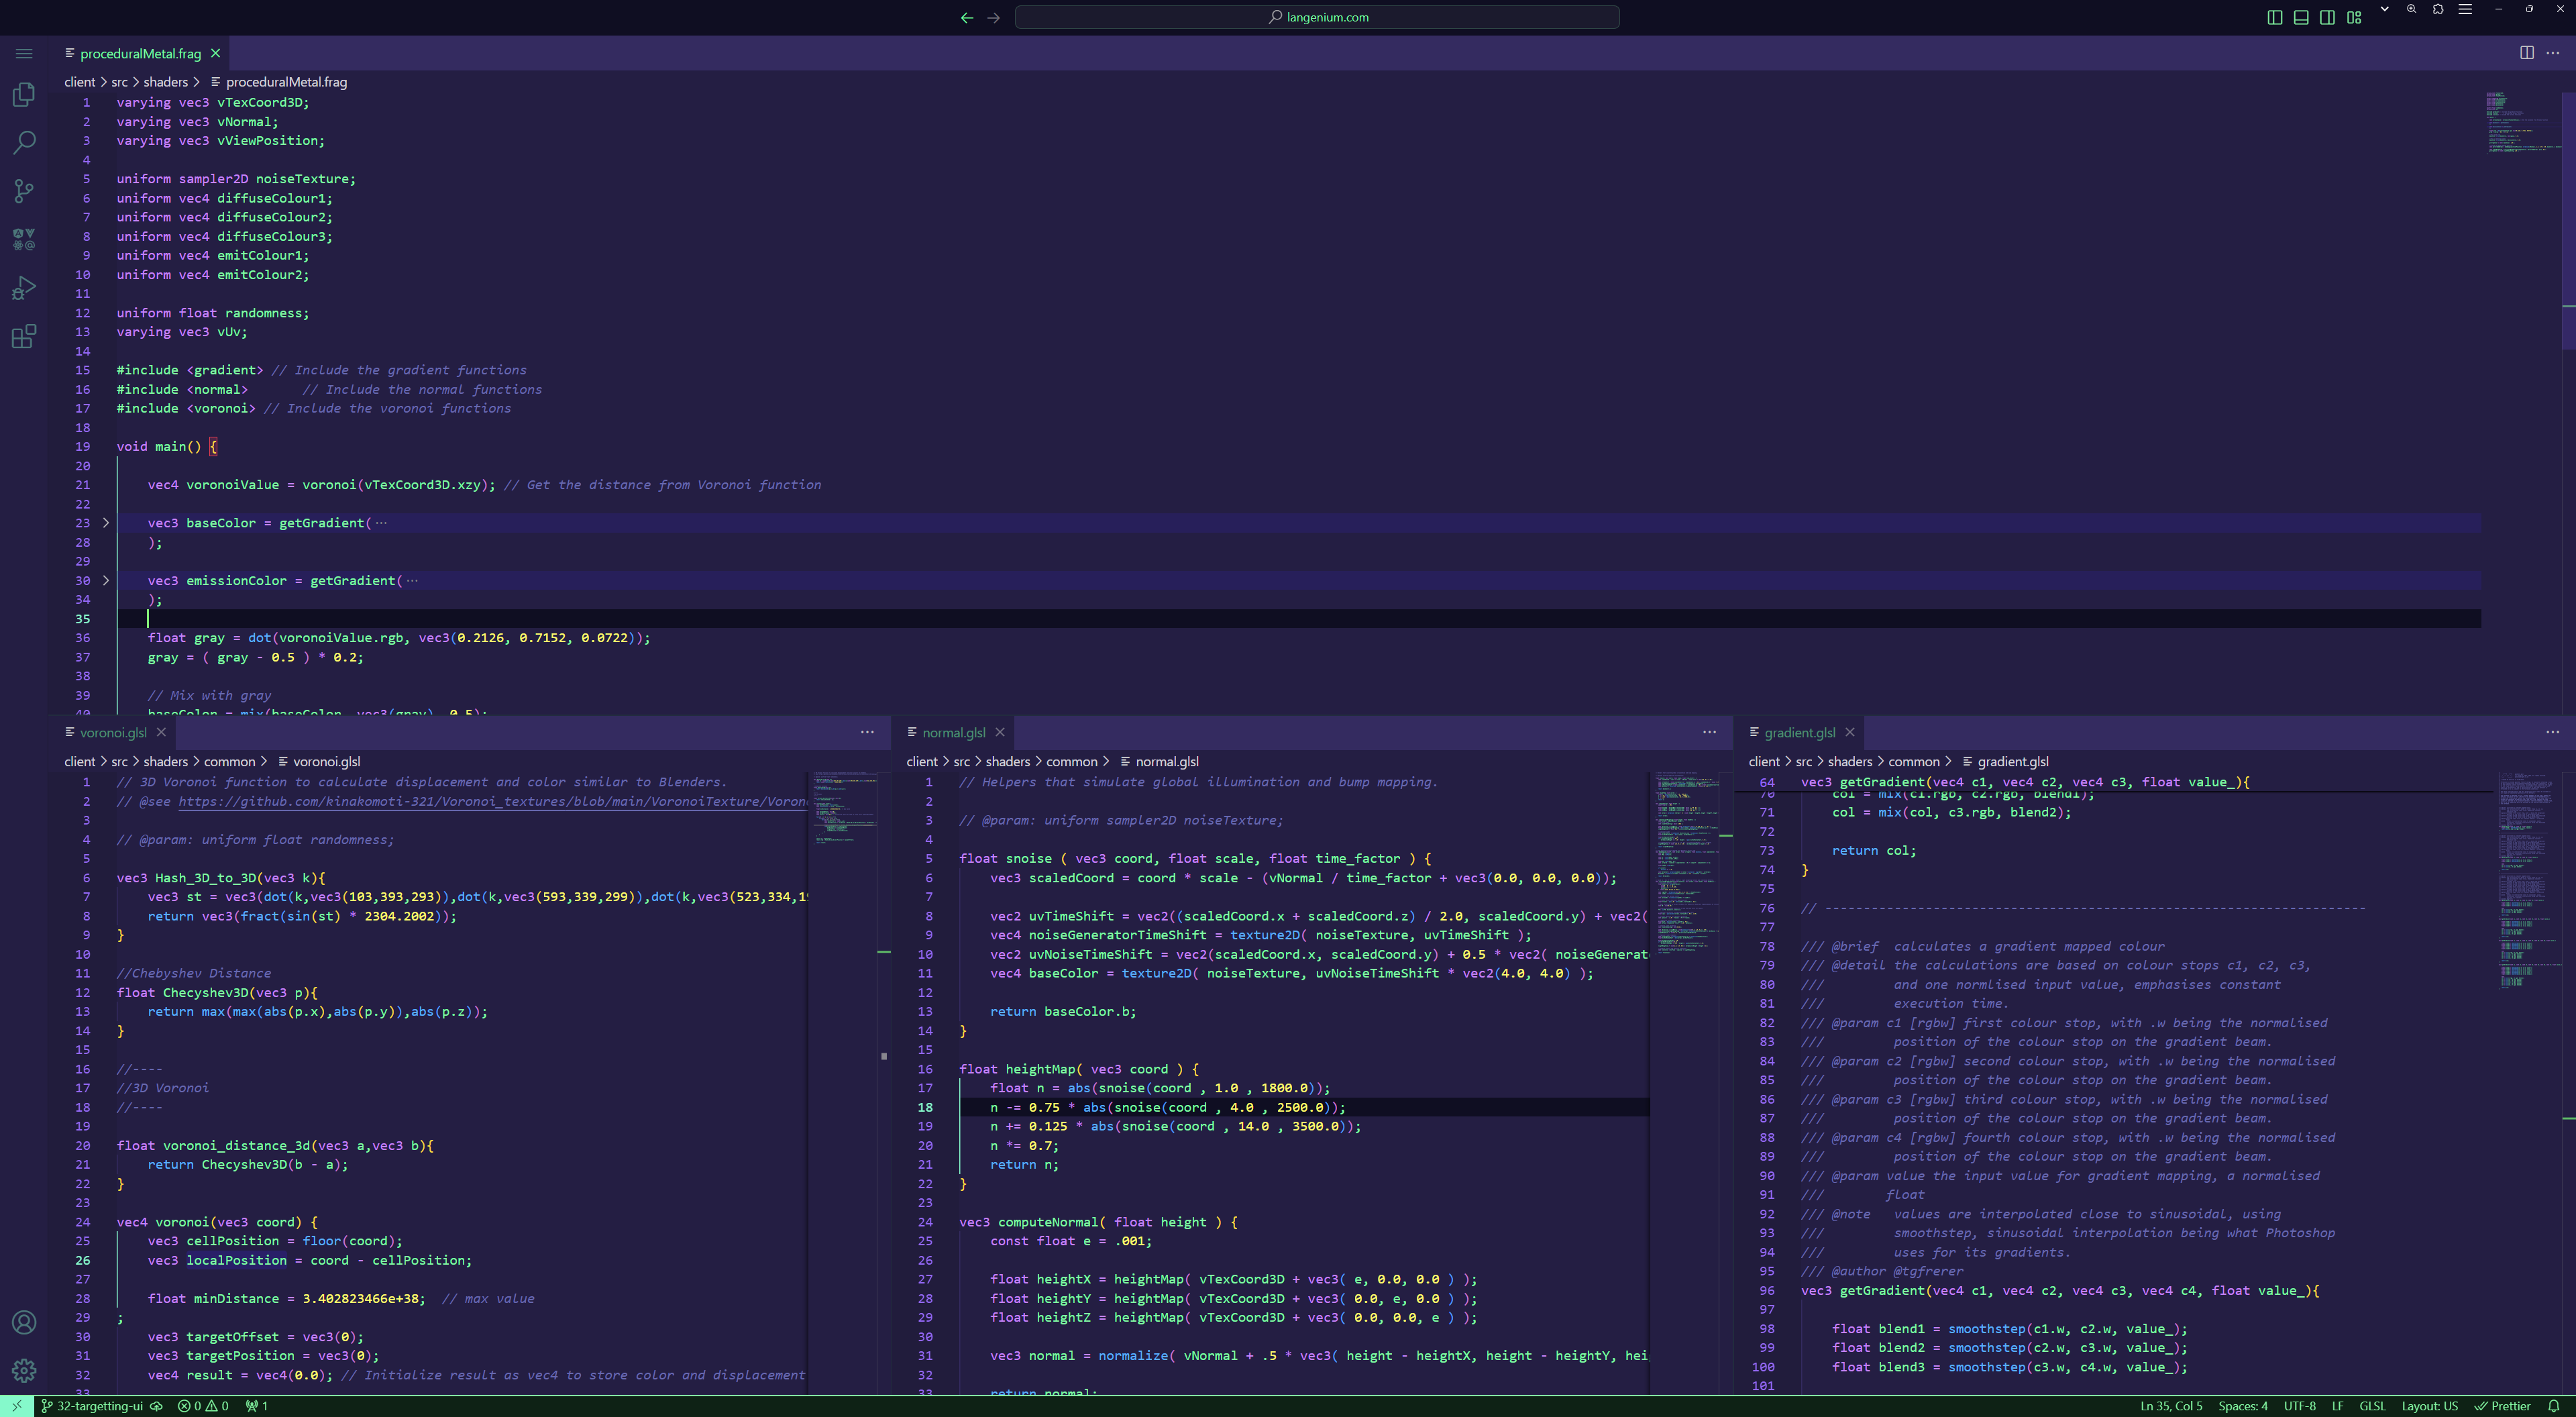
This annotated screenshot shows the original material in Blender and how it relates to the new Procedural Metal fragment shader. Here’s what’s going on:
Red: Voronoi Texture generation, creates the metal panelling shapes
Blue: Creates the first gradient filter which draws white lines on the aircraft surface
Green: Creates the second gradient filter which draws red lines on the aircraft surface
Yellow: Merges all the outputs into a single colour using PBR techniques
Magenta: Creates a displacement map that simulates ridges between metal panels
Cyan: Sends the output to the shader for display
Side by side comparison
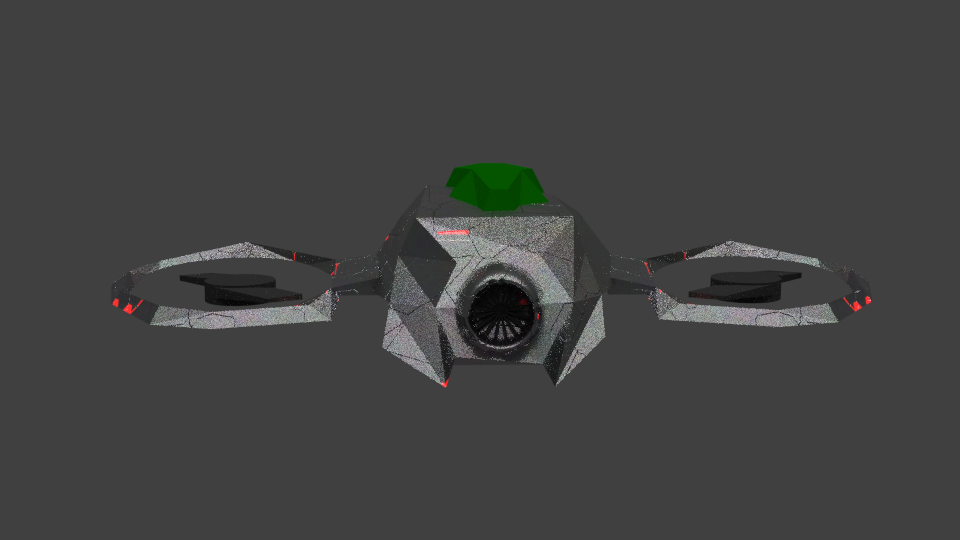
The Procedural Metal material isn’t an exact match to the original one from BlenderKit, however it’s more than enough for this stage of the project.
The full source code for the new aircraft material, known in Langenium’s codebase as the Procedural Metal shader, is open source and available on Github via the links below.
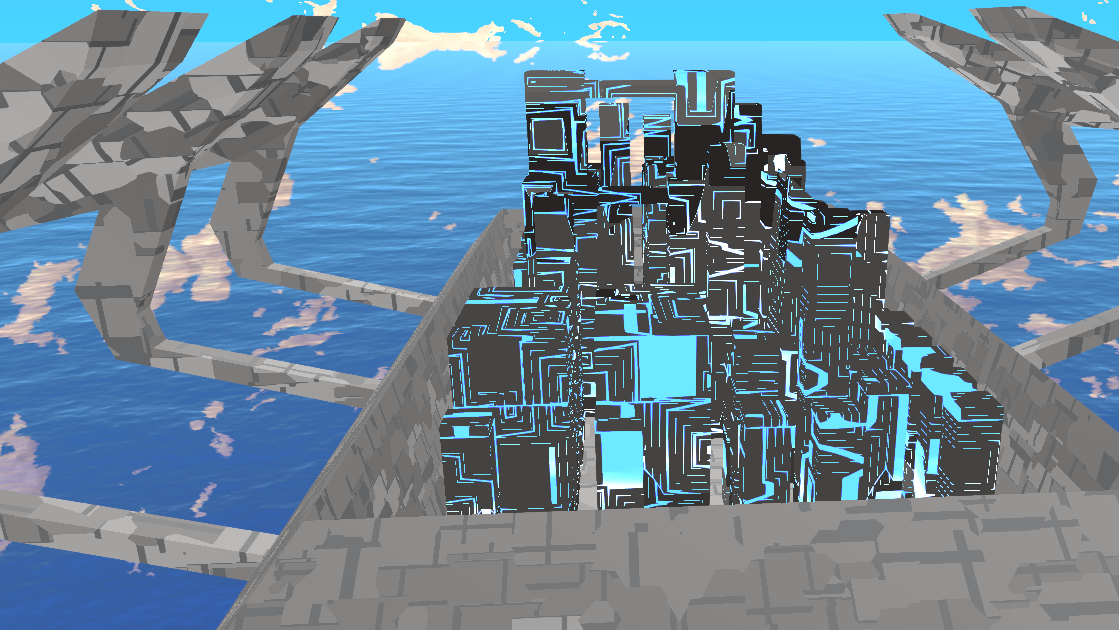
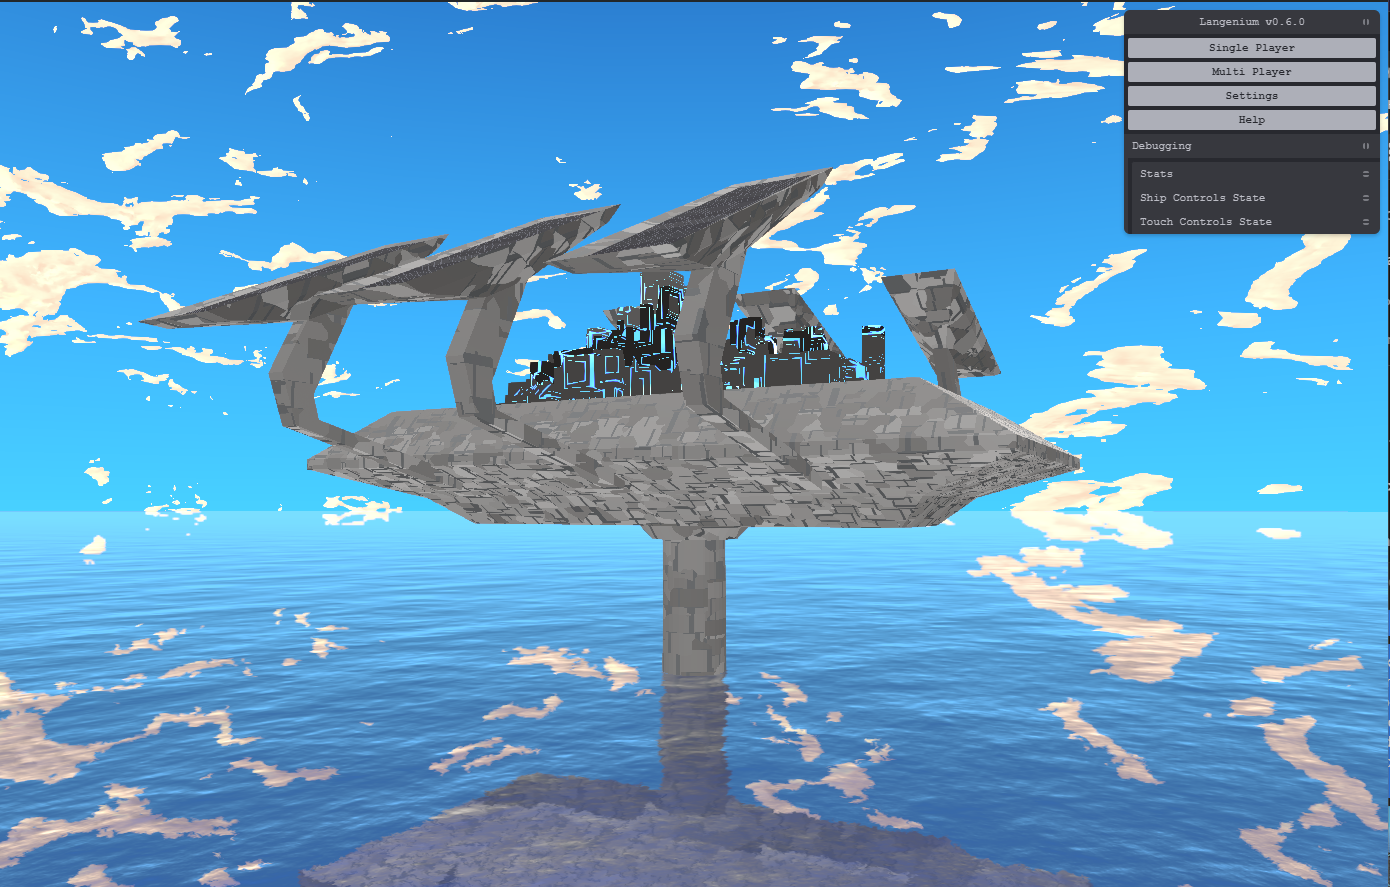
Writing a customer shader material for a futuristic sci-fi city
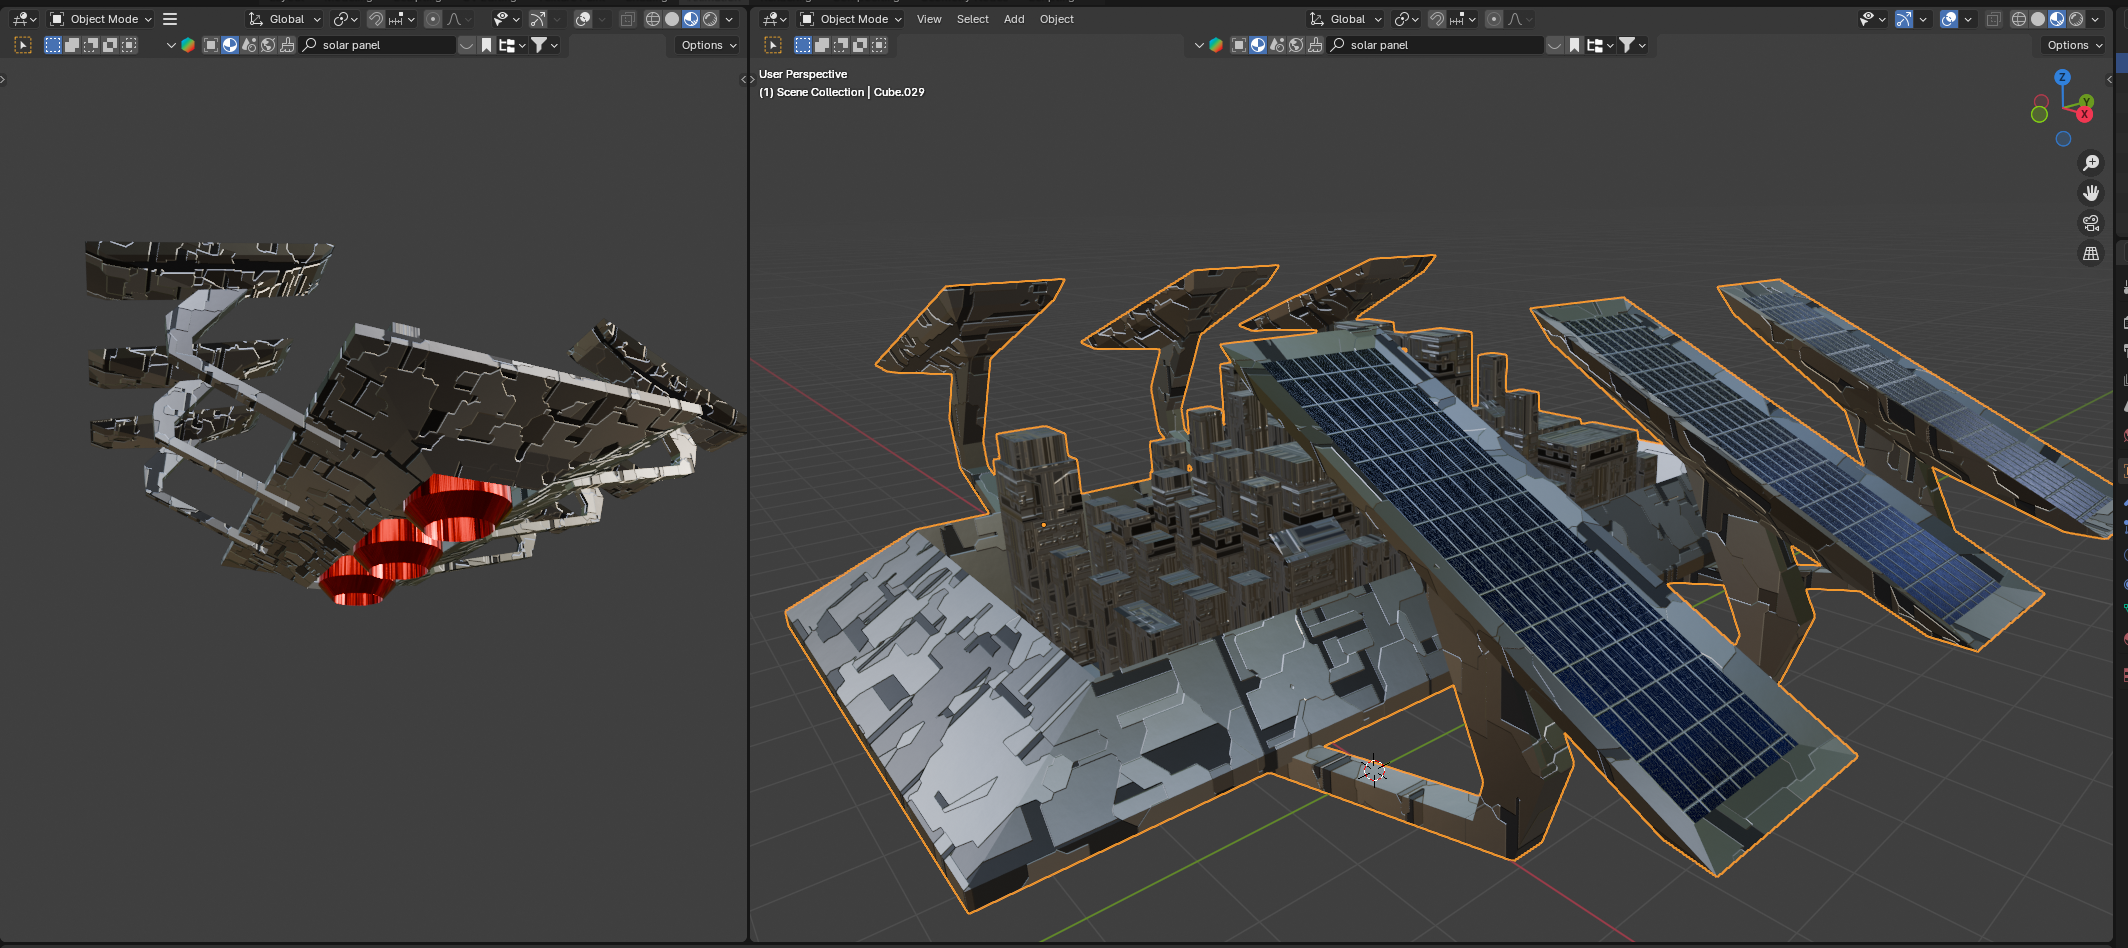
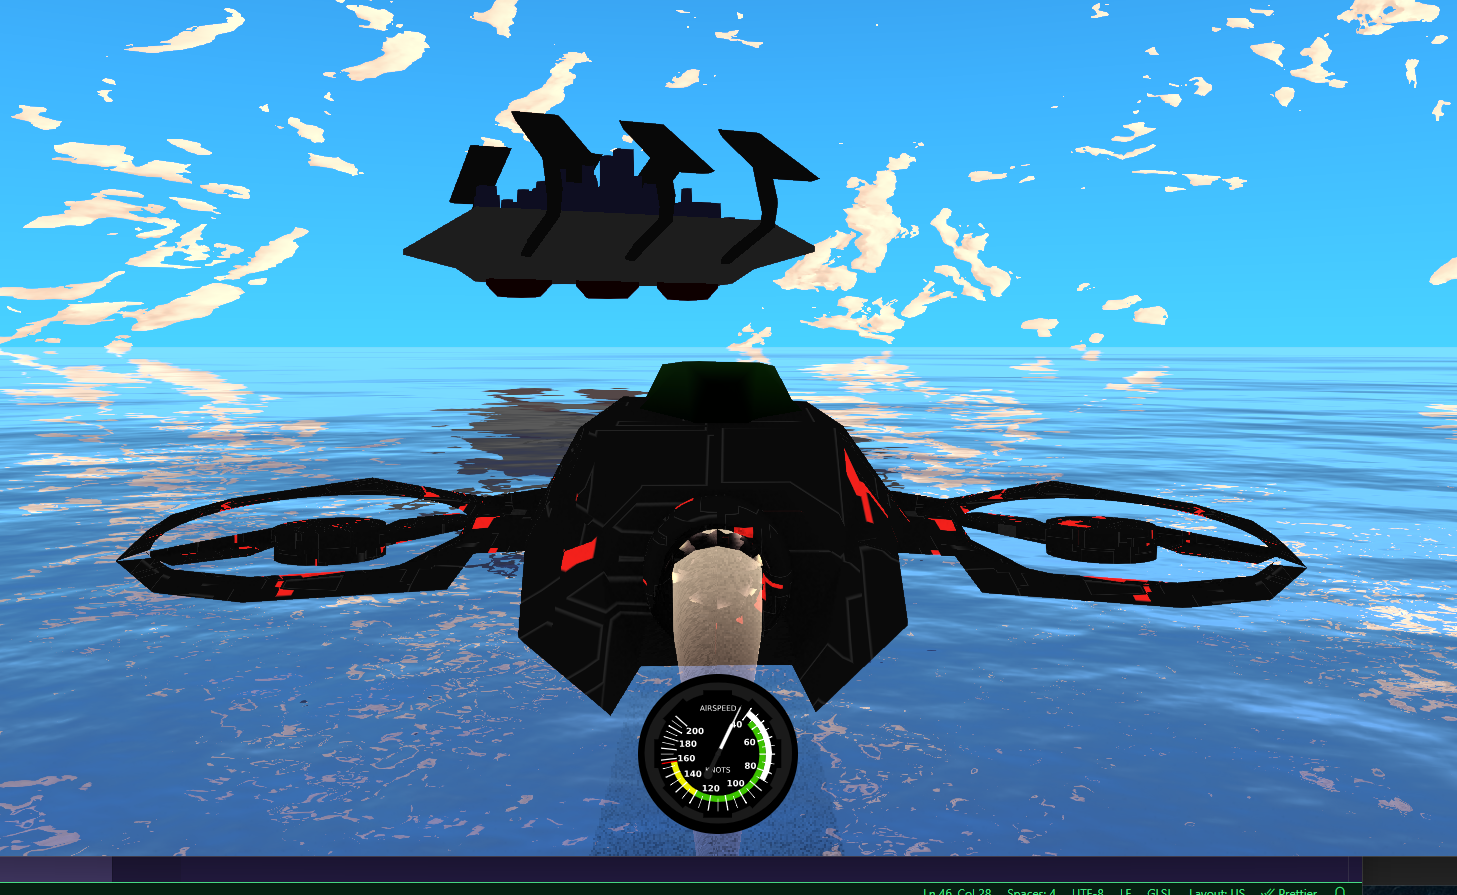
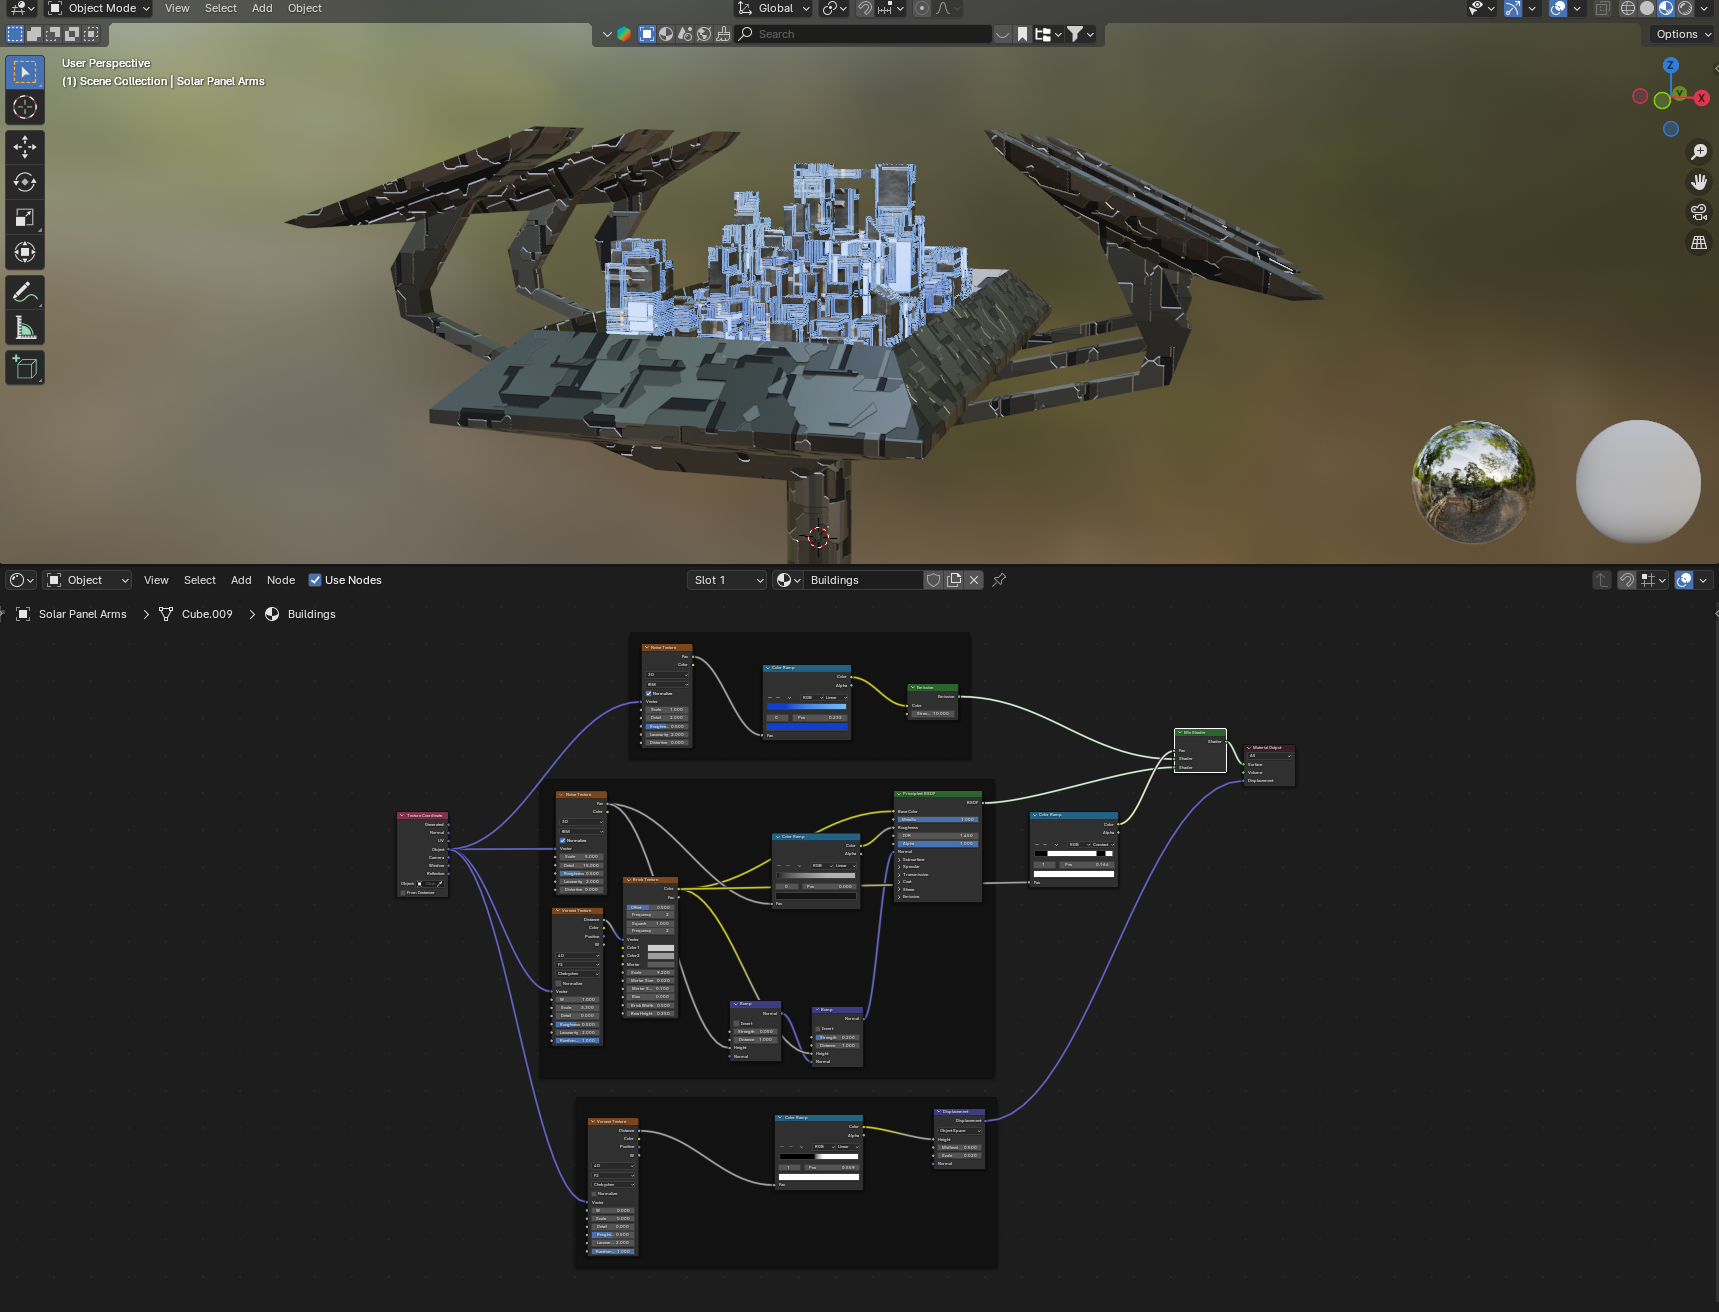
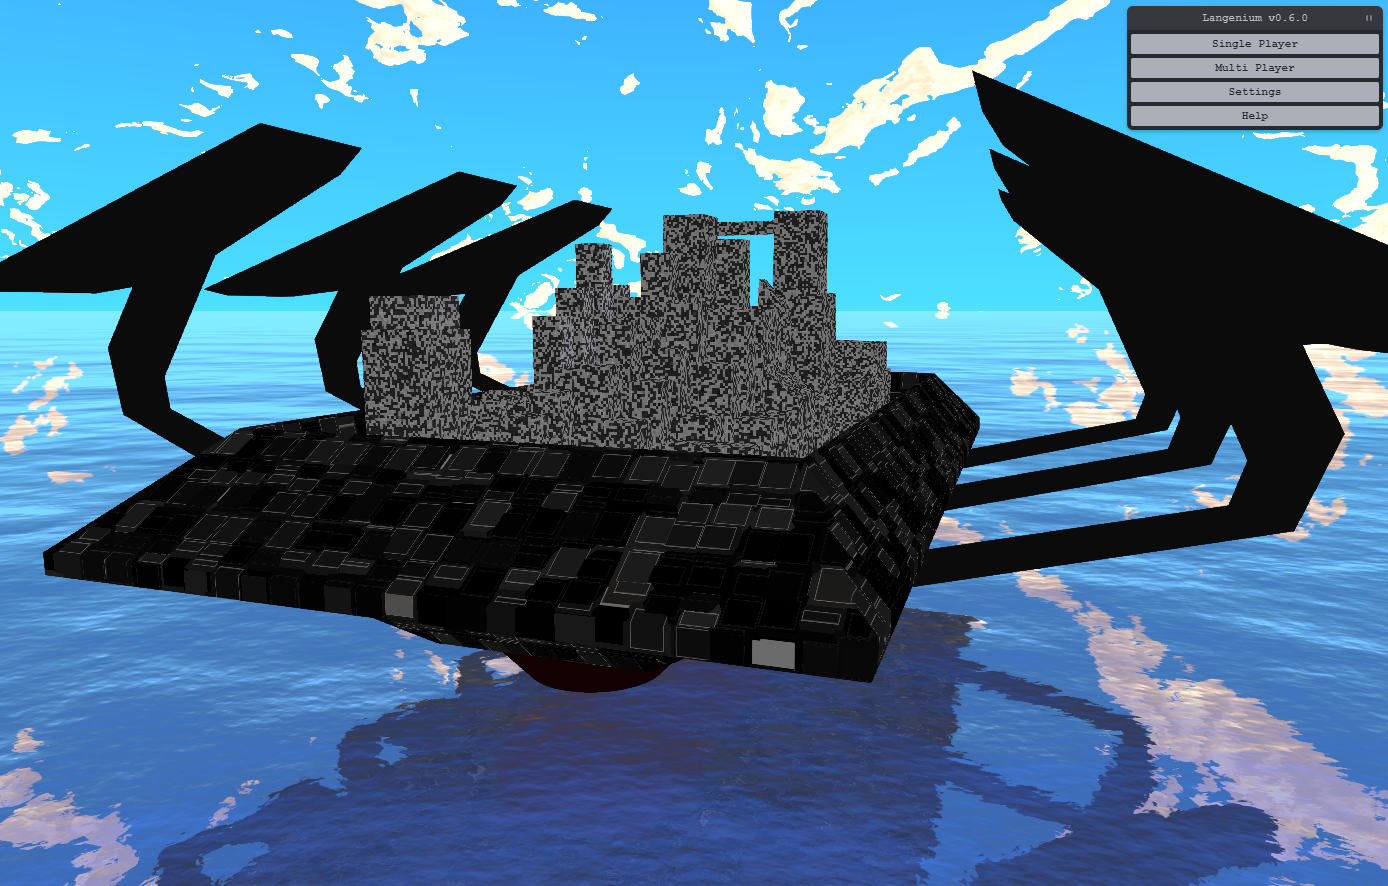
Now that the main player aircraft was starting to look like it does in Blender, it was time to work on the game’s futuristic city. This model uses three different procedural materials – Procedural Scifi Greeble for the city’s chassis and megastructure, a modified Procedural Scifi Alien Metal Green for the buildings and Solar Panel material for the six enormous ones protruding from the city.
All the materials used by the city called for the Colour Ramp node, the buildings and chassis also required the Voronoi Texture node and a Brick Texture node. It was time to write my own Brick Texture function.
Recreating the Brick Texture node
The Brick Texture node provides the square shape for metal panelling in the Procedural Scifi Greeble material used by the city’s megastructure/cradle/chassis. This texture node draws a brick like grid with optionally offset rows and other settings for things like gutter widths. As it was pretty easy to conceptualize, I got ChatGPT to help me recreate the Brick Texture in GLSL. The current result isn’t an exact recreation of what was in Blender but once again it’s close enough.
Side by side comparison and final result
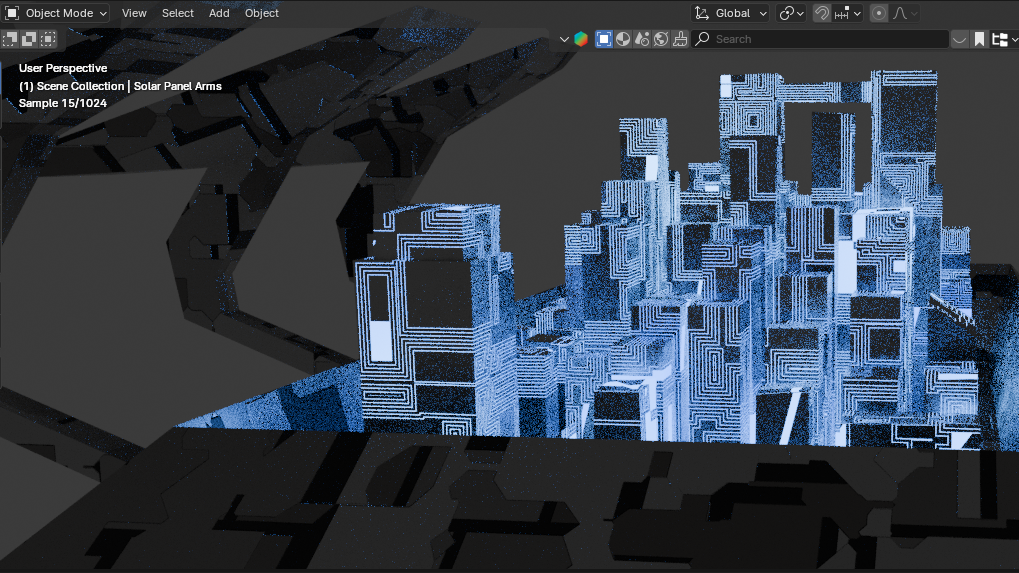
There were two major differences between the Blender version and the final result I got. I wasn’t able to get the same shapes on the city’s buildings, potentially because I am using WebGL compatible Voronoi and Brick texture code that differ too much from Blender. The other difference is the displacement map doesn’t affect vertices as nicely in the game as it does in Blender. This is something I might be able to work on but I currently don’t really want to delve too deep into getting that right now due to the functions I needed to draw the textures not being available in the vertex shader. I found this out when I tried to migrate the Voronoi and Brick texture code into the vertex shader but just couldn’t get it to work.
The problem is that in WebGL / real time graphics there is a more rigid rendering order and pipeline than Blender. As a 3D graphics design tool, Blender can implement a material shader node that modifies geometry because it’s not trying to maintain 60 FPS (Frames Per Second). It might be possible to implement some additional logic to make Three.js support this, perhaps even just by modifying the actual texture code… but that’s just a rabbit hole I don’t want to deal with right now.
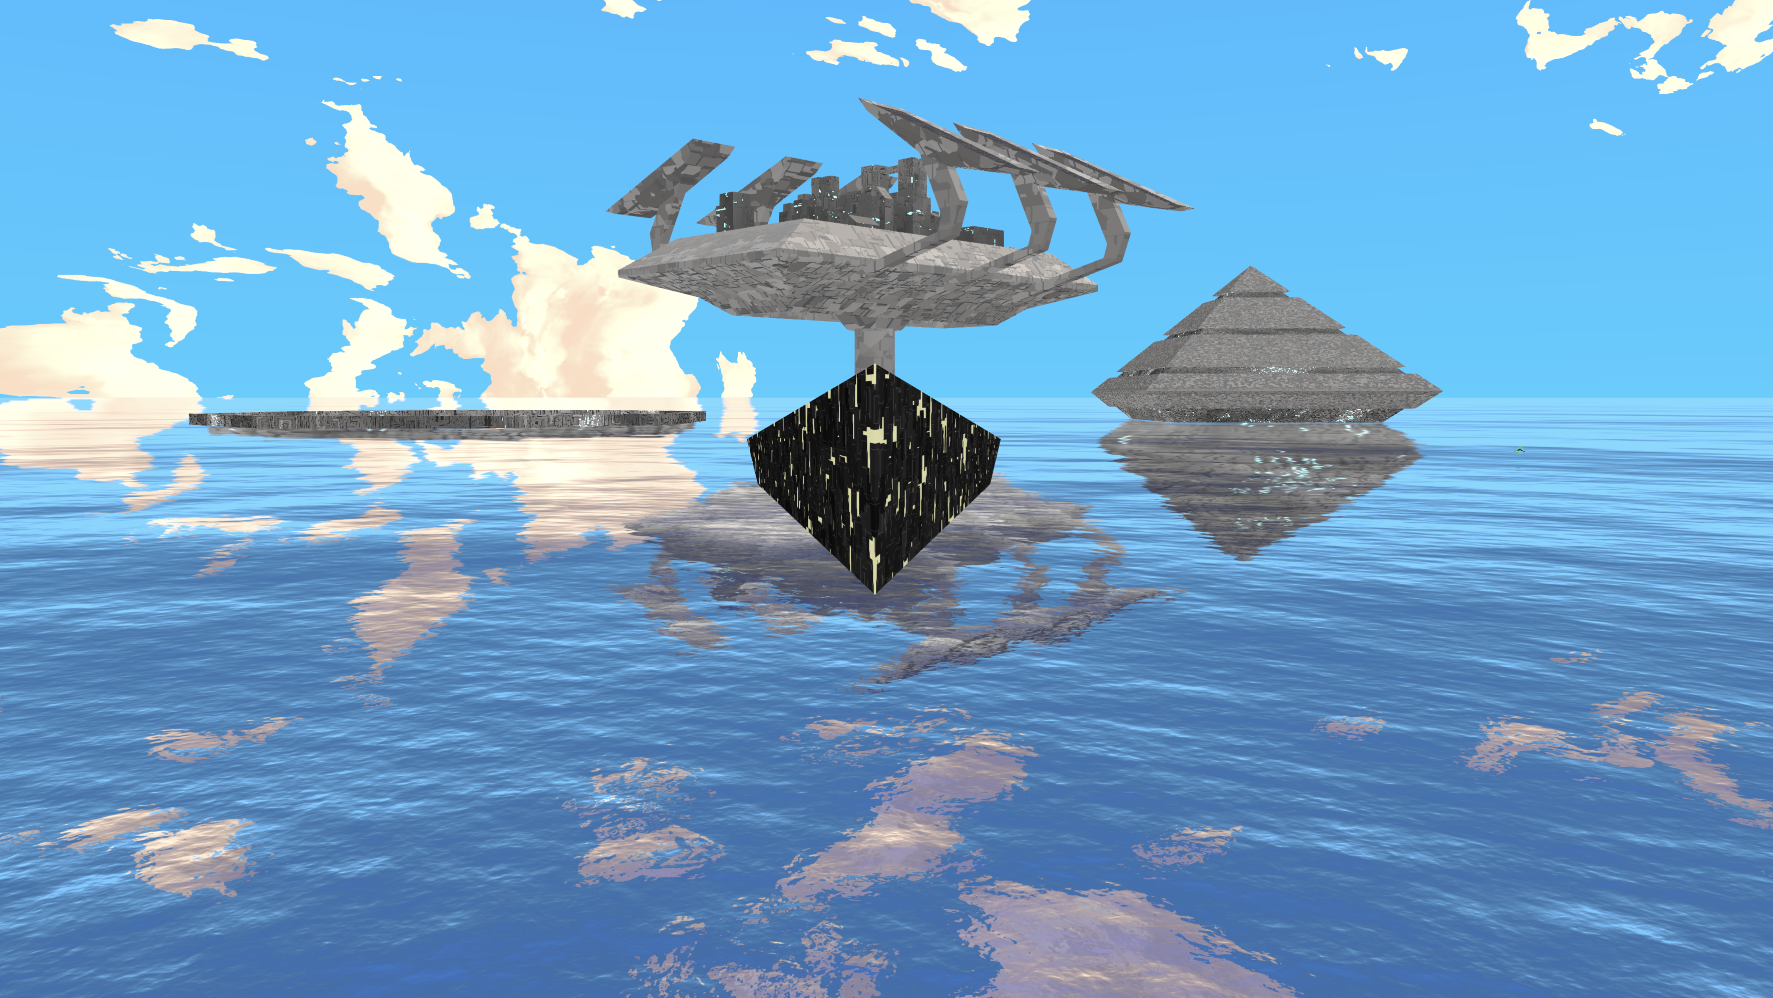
Overall I’m happy with how the city ended up looking, the entire model reacts nicely to the environments lighting model and has set the aesthetic for structures in the environment.
The full source code for the procedural city materials are open source and available on Github via the links below.
Programmatically setting transparent areas in a shader surface
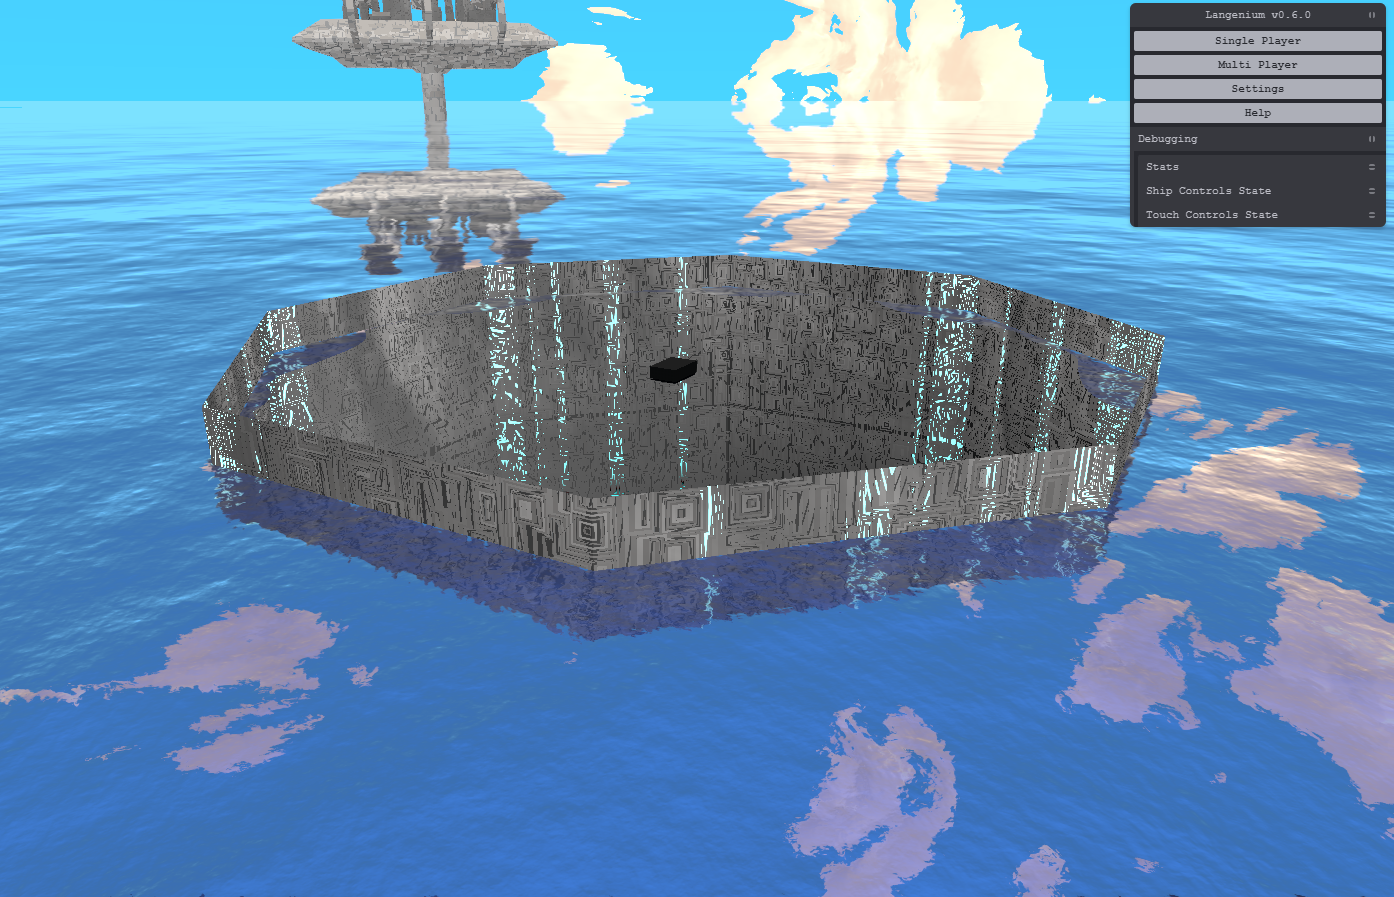
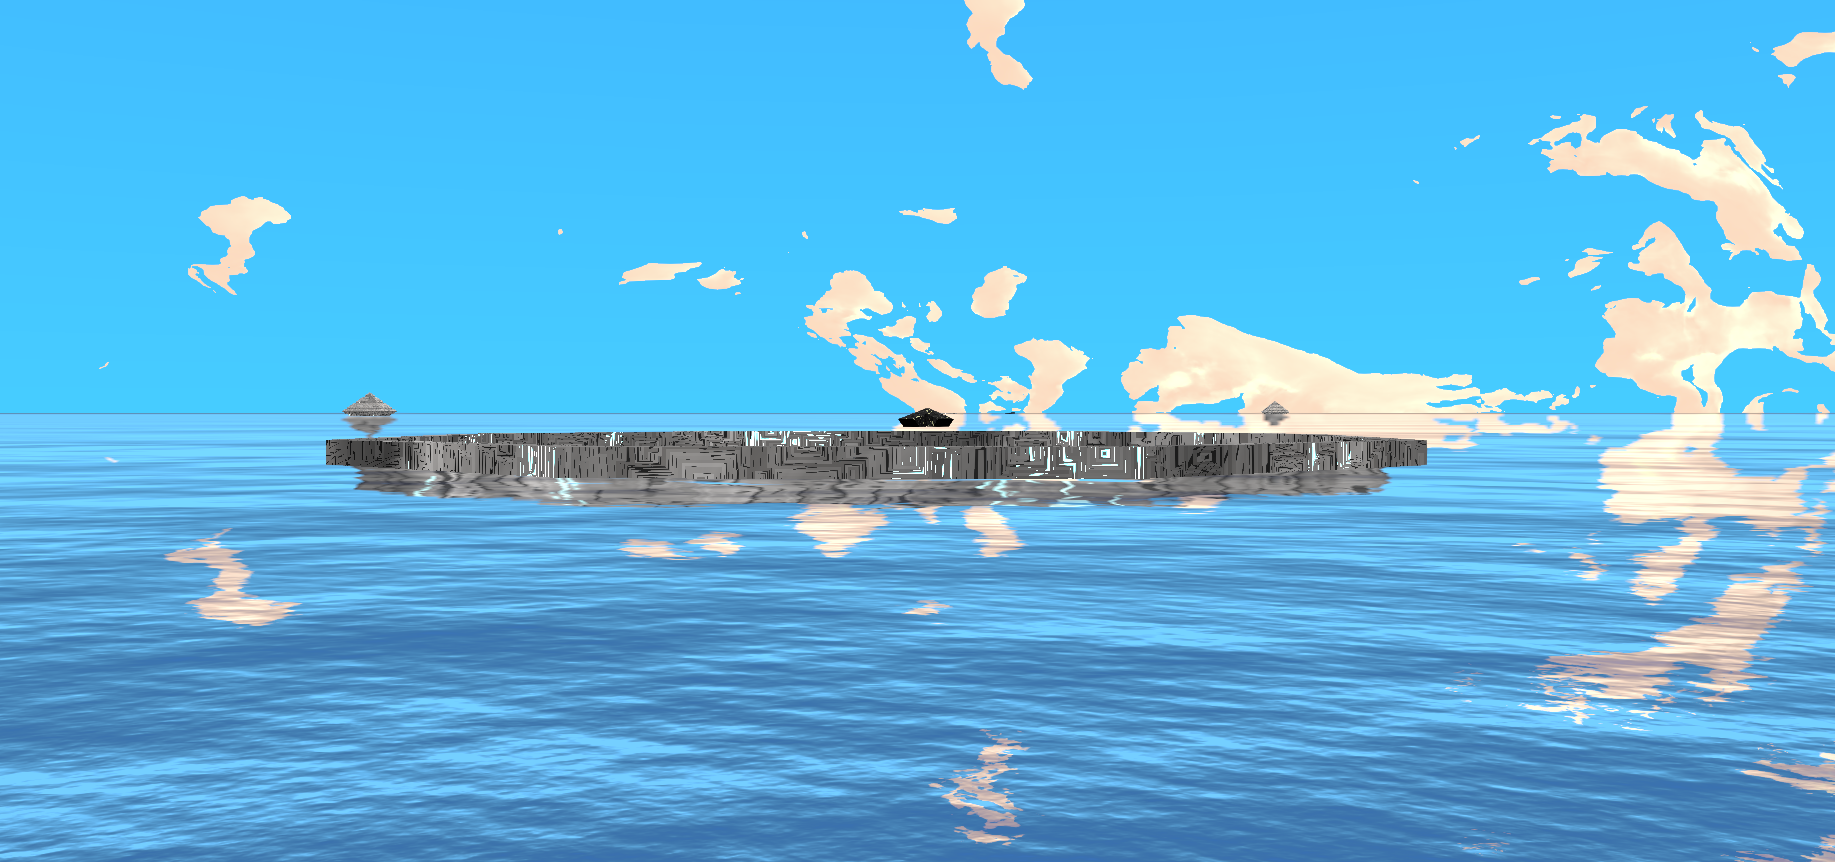
I’d thought about what kind of interesting objects I could place on the ocean’s surface that made sense with the game lore, and came up with the idea of these giant industrial wells with an opening you can see from above that reaches below the water level. Now that I had a bit of practise with writing shader code, I decided to tackle cutting shapes out of the ocean. I’m using the THREE.Water for the ocean’s surface and opted to just hack the inline GLSL used by that for now. I passed in a custom alpha map texture which would be used to determine whether to draw water or show transparency. To ensure the concept would work, I initially used a simple solid white PNG with a couple of solid black hearts.
With the concept proven, I changed the shader uniforms to take in an array of co-ordinates of where the industrial wells would be. Within the shader, the co-ordinates were iterated and a hexagon was placed at each location and used as an alpha map to create the transparency in the ocean.
// added to the uniforms section at the start of the shaderuniformfloat submerged_objects[${submergedObjectsFlattened.length}];uniformint submerged_objects_length;// added before the final gl_Fragcolor assignment in the main functionfor(int i =0; i < submerged_objects_length; i +=3){float x = submerged_objects[i];float y = submerged_objects[i +1];float radius = submerged_objects[i +2];// Calculate the absolute distance from the center (x, y)vec2 delta =abs(worldPosition.xz -vec2(x, y));// Calculate the half-width of the octagon sidesfloat halfSideLength = radius /sqrt(2.0);// Check if the point is within the octagon shapeif(
delta.x < halfSideLength &&
delta.y < halfSideLength &&(delta.x + delta.y)< radius
){discard;}}
If you’re unfamiliar with GLSL, the discard command tells the Fragment shader not to draw this fragment. This ended up being even cleaner than setting it to transparent.
With the hole cut out, it was a trivial effort to chuck a hexagonal cylinder into the hole and use the city building material on it.
Developing the custom structure using simple 3D geometry
The walls of the new structure looked a little thin and I wanted it to look convincing. The water line also clipped into the walls a little bit which wasn’t ideal, it’d occasionally glitch as you rotated the camera.
Langenium uses a library called three-bvh-csg for Constructive Solid Geometry (CSG) features. These features can be used to do simple math operations on 3D Objects. I used CSG subtraction to subtract a smaller cylinder from the main structure, creating a thick wall which worked well to achieve the result I was after. The edges of the water are nicely covered and the structure looked complete.
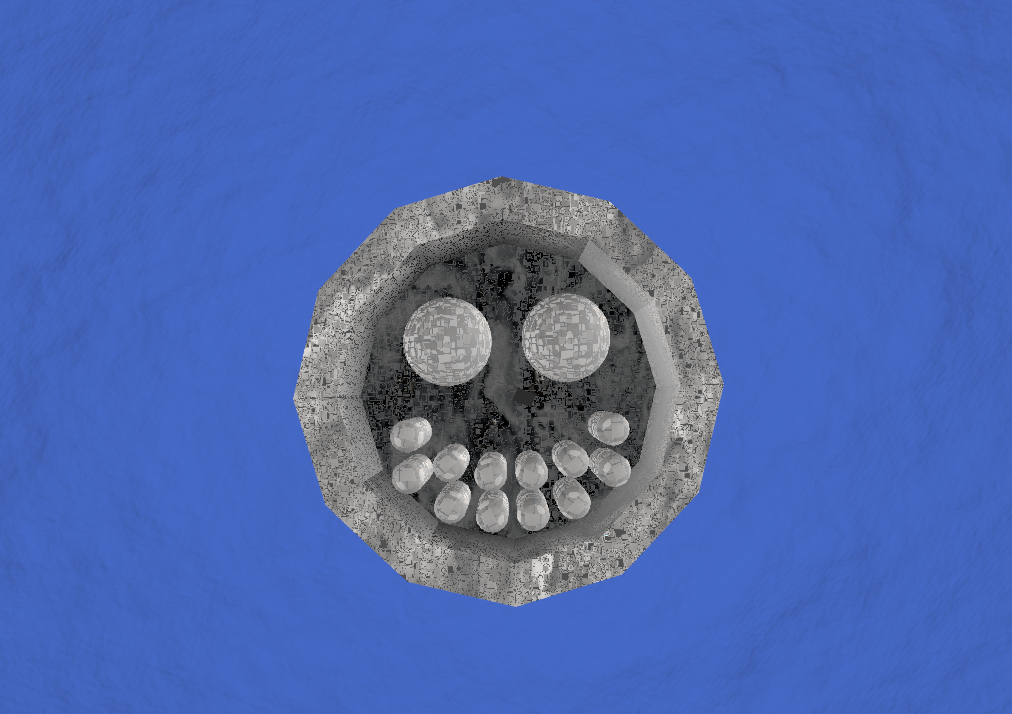
Looking to fill out the empty space a bit, I tried to add some storage tanks and dome shaped buildings but it just looked busy. I also had some fun with it and drew a face with the buildings.
In the end the structures didn’t add enough to justify their existence so I opted to just make the wells really deep so the effect would be dramatic if you fly over them in your aircraft.
The new structure
Playing around with alpha mapping, I was able to quickly creating a unique new asset for the game now called an Extractor. A key part of some gameplay ideas in the works, but more on that later.
Creating new sci-fi structures with constructive solid geometry
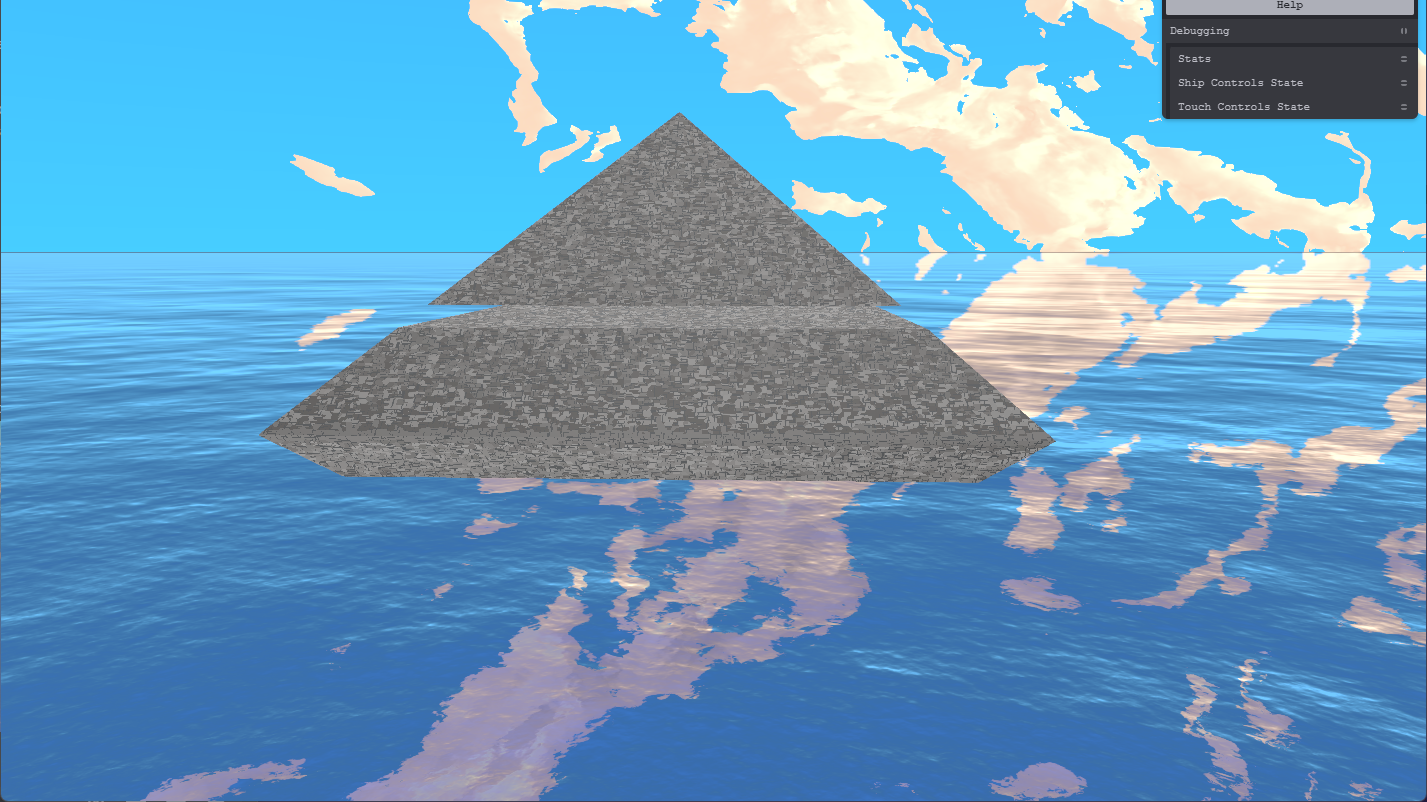
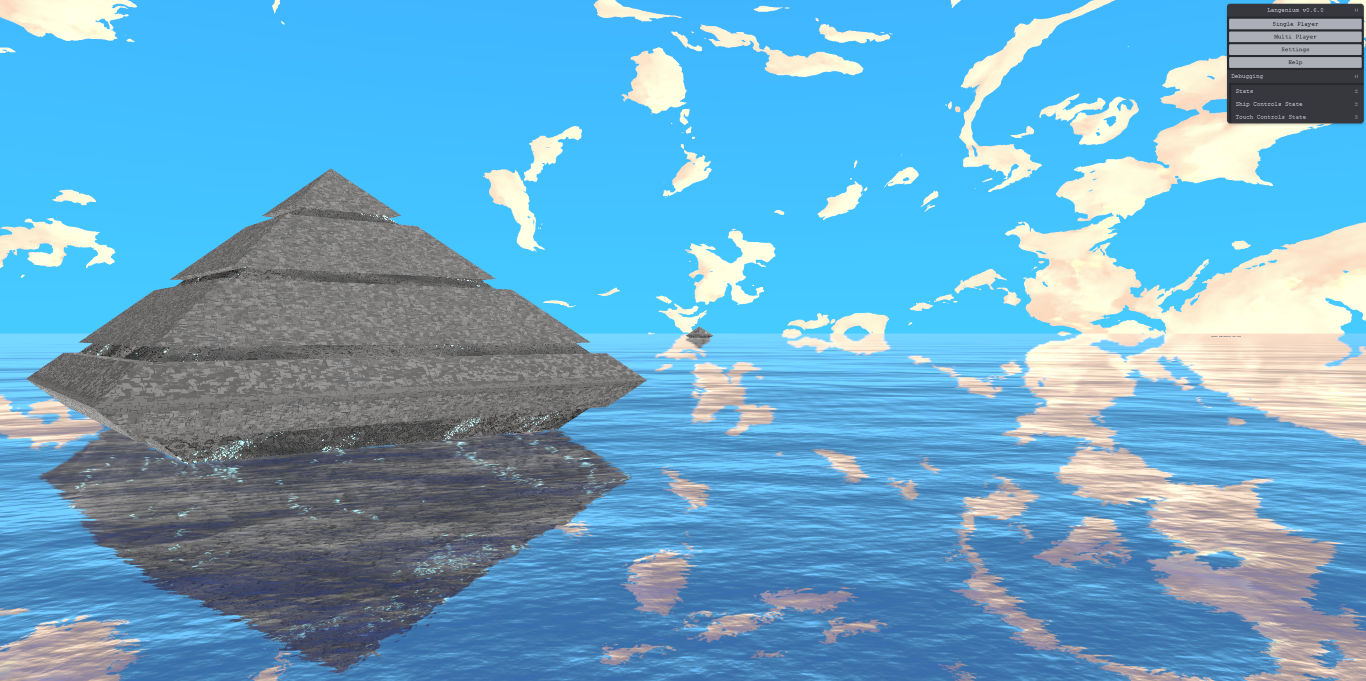
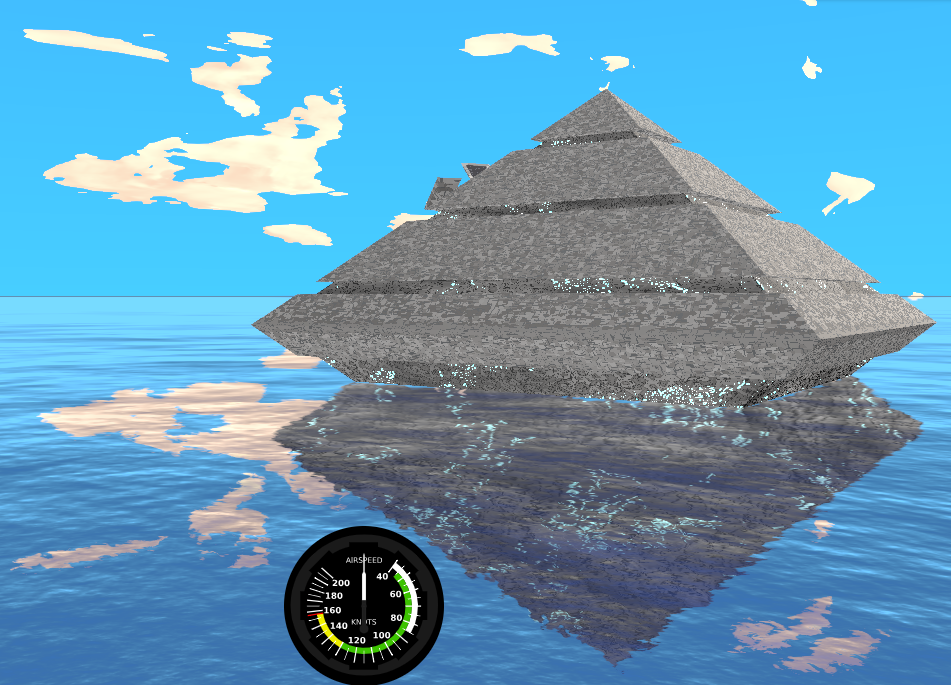
Encouraged by the leaps and bounds the game environment had been enhanced by this work, I decided to add another object to the environment. Given the last one was an industrial “Extractor” I decide to name this next structure the Refinery. Using a tetrahedron as a base, I stretched, rotated it so one corner would face up and submerged it partly – to look like a futuristic pyramid floating on the water.
To add complexity to the basic shape, I added a smaller inner tetrahedron with a different darker material and then used Constructive Solid Geometry to cut horizontal slices out of the outer shape. The outer object uses the city chassis material and the inner shape uses the city building materials.
Creating new sci-fi vehicles with constructive solid geometry
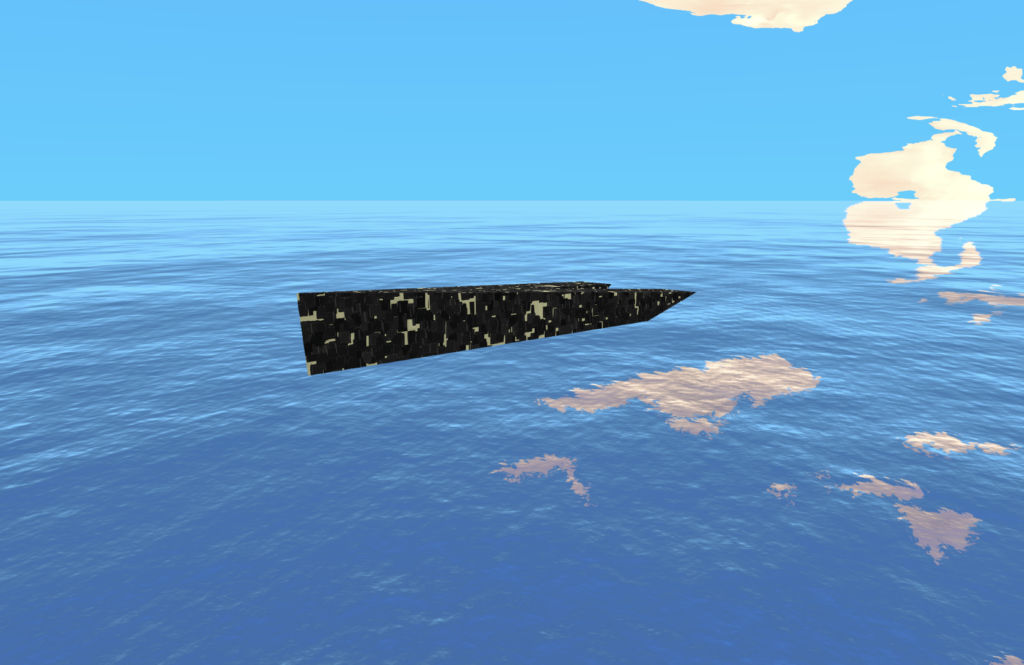
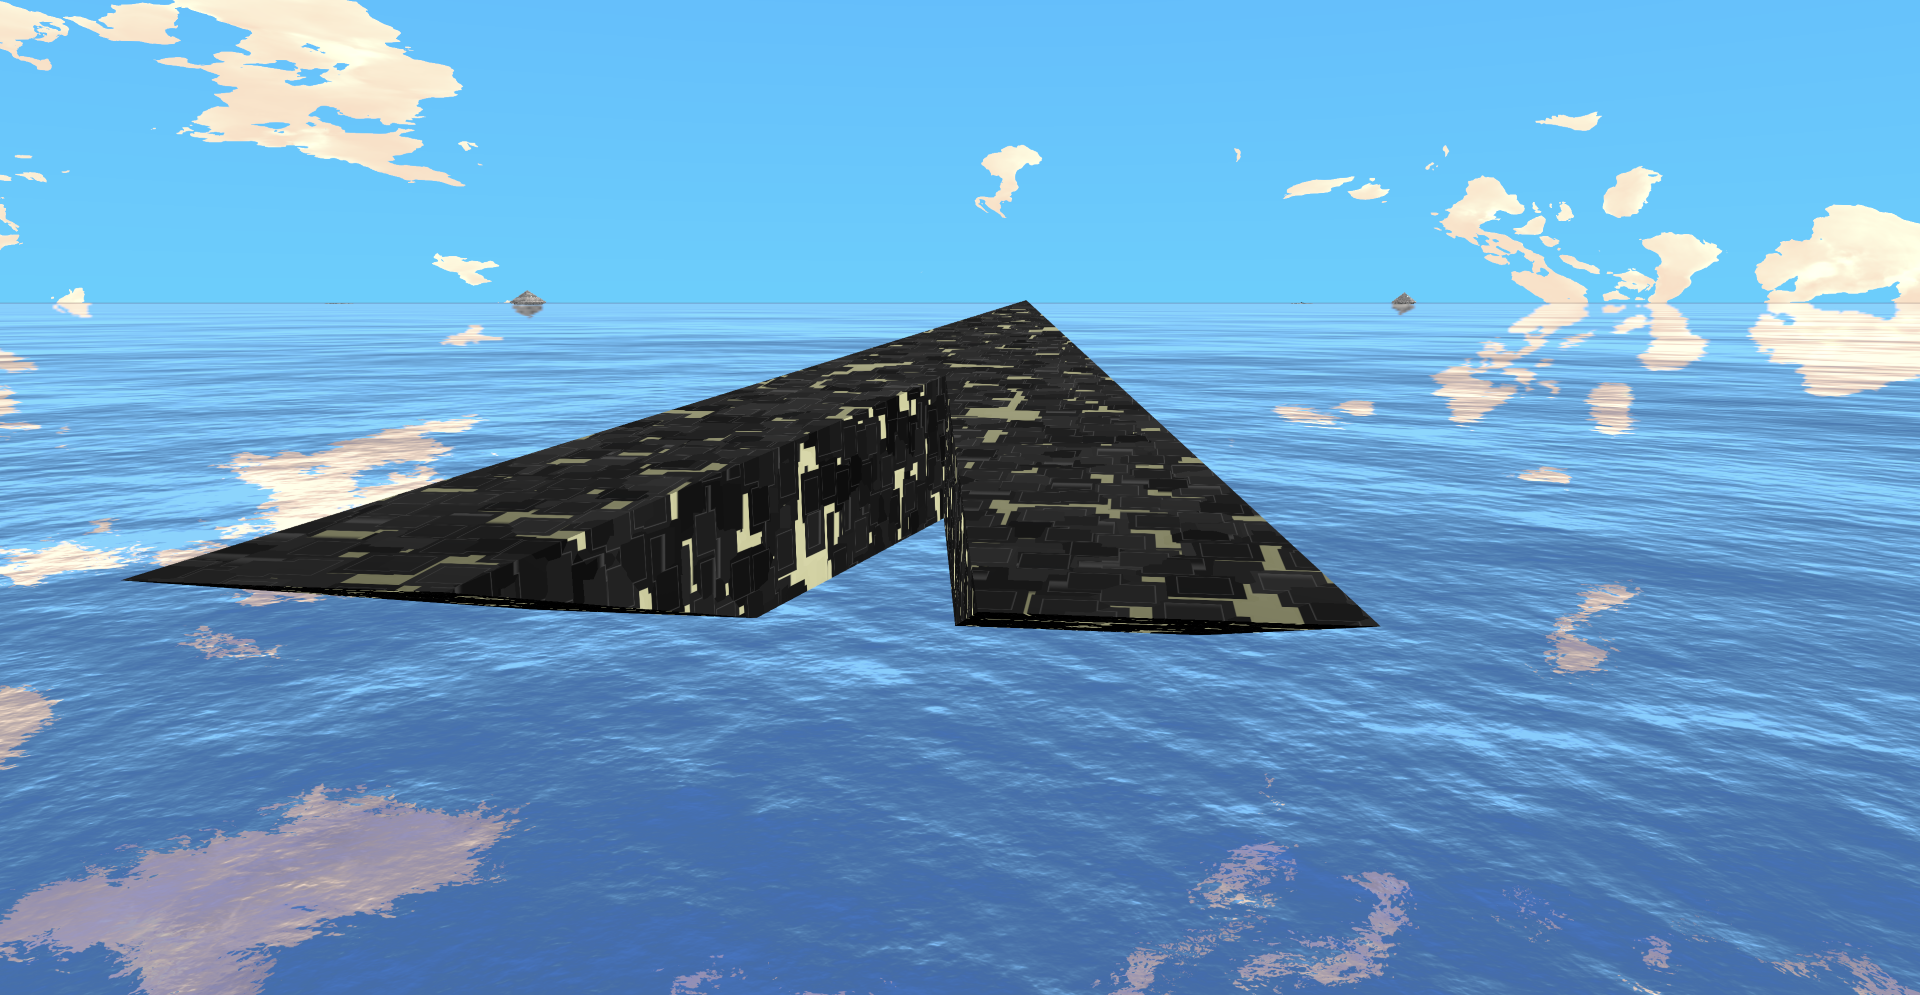
Having the City, Refinery and Extractor structures in place I was inspired to add some transport ships that would travel in between them. Once again, using the new procedural shader materials and Constructive Solid Geometry, I created some chevron shapes. This result is quite simple but perfect as a background object that the player won’t really be too focused on up close.
In the future, it would be good to add some additional geometry to these such as crew compartments and communication equipment you usually see on ships. For now, the result is good enough.
Creating reusable shader fragments with Three.js
As this ticket progressed, I tried to figure out an optimal way to structure all the fragment shader code. I needed them to share common functions and clearly define what they’re doing in a main outline. Three.js doesn’t support GLSL includes but provides a mechanism called ShaderChunk that allows you to do essentially the same thing at runtime.
Rather than including a file with a call like #include voronoi.glsl, the Three.js ShaderChunk uses variables and so I just had to use #include <voronoi> and declare the shader chunk variable. The Langenium engine implements a Materials class that does the following in its constructor to declare the shader chunk variables for compilation.
In the screenshot below you can see the Procedural Metal Fragment shader along with the ShaderChunk variable includes it’s using – gradient, normal and voronoi.
The full source code for the common shader files and material class are open source and available on Github via the links below.
Provides functions that take inputs to create cellular Voronoi graphs
Caching shader materials in the browser
Looking to optimize the new materials, I had the idea to cache key data such as the noise maps, normal maps and Voronoi textures. Even if I couldn’t fit them into memory, modern technologies like the Web Storage API which could come in handy for caching procedurally generated files automatically optimised for and stored on a user’s device.
To cache procedurally generated shader materials, I needed to render the texture images in a separate pass from the main loop. In my proof of concept, I applied the Procedural Metal shader to a flat mesh using PlaneGeometry and rendered the result onto a canvas element. To preview the cached texture separately from the 3D model, I displayed the canvas as an overlay.
This approach was good enough to cover the mesh with texture sort of close but unfortunately the use of a PlaneGeometry meant it didn’t look the same in practise as a shader material that wrapped itself around the custom geometry of the aircraft model. When I tried to fix this issue, I discovered it wasn’t possible to export the custom surface details along with how they map to a custom model.
In the future I definitely want to revisit this technique and try to complete the approach by caching the material mapping data. Even if that doesn’t work out, this approach could come in handy as an optimisation for objects that are too far away to see details on. When dozens of aircraft are in the scene, this could be an essential part of the strategy to optimising engine performance.
Summary
The new materials and objects have created a solid foundation that can be enhanced and extended in the future. In particular I would love to get geometry displacement and caching right. Achieving a displacement effect similar to Blender’s shader node may still be possible in the browser but it will probably be a significant challenge. Caching shader materials would allow advanced visuals and effects to be accessible on older and lower powered devices, as well as allowing for more overhead for even more advanced visuals on more powerful hardware.
All the new assets produced in this piece of work have setup the game environment for actual gameplay features to now be added. Previous versions of Langenium had a Bullet Hell style approach, but in practise it was actually not very fun trying to line up shots in a straight line. That kind of play style might have been acceptable twenty or thirty years ago but not today. Especially on a mobile where you don’t have very good controls for fast reaction times to dodge attacks.
Langenium is my love letter to my favourite video games and the game development scene at large, it includes gameplay ideas that mix real time strategy, role playing games (RPG) and aircraft simulators. With the new visuals, I believe the project has become elevated to a new height – the game is visually comparable to modern console and PC games that occupy tens to hundreds of gigabytes of storage.
The next ticket is called Basic Gameplay and will introduce more UI development, pathfinding AI, enemy aircraft models, targeting overlays, missiles and damage systems. The final goal of this ticket is to have players control a protector aircraft for the cargo ships which will be under attack by hostile aircraft. Within the game’s story, cargo ships are transporting the titular Langenium element between extractors, refineries and the main city.